Making the switch to artificial turf that's pet-friendly? Installing it yourself at home? We've created a DIY guide to assist you with your pet turf installation! It...


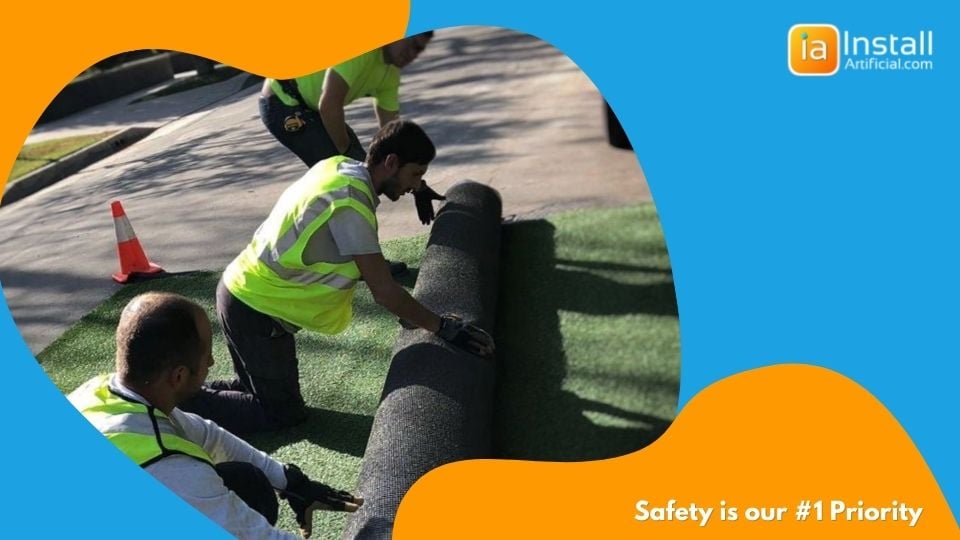
When learning how to install artificial turf, safety protocol should be top of mind before beginning any artificial turf project. Once the crew arrives, they should first line the perimeter with cones to close off the project site and ensure safety for people and vehicles on the street. Only once the area is lined and the artificial grass installers are in their protective gear, should the work begin.
Typically artificial grass installation will require the use of dumpsters, professional equipment, and multiple vehicles. So make sure you and your contractors plan ahead to ensure you'll have enough street and driveway space to accommodate this for the duration of the synthetic turf project. You'll also want to make sure that you're not violating any HOA or city codes while completing your lawn renovation.
Before artificial grass installation starts, the first step is to check for any underground hazards. It is very important to make sure that after artificial grass is installed every single planter or tree will have a water source. Failing to do so will result in live plants and trees dying without manual watering.
Also, any unwanted sprinkler heads will be located and either capped or removed when installing artificial grass. When checking irrigation, it's always best to cut any existing lines. However, if the line is feeding nearby planters they may need to be left in place - being environmentally friendly is the name of the game.
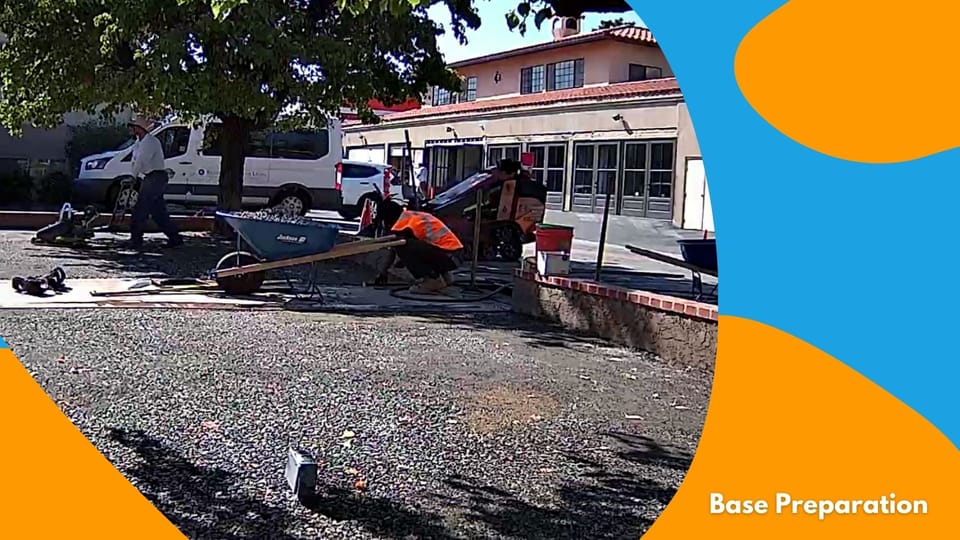
Installing a base surface for artificial turf is a vital step that will determine the quality of your artificial grass. Remove the existing grass and roots and then smoothly grade the surface to set yourself up for a seamless installation. For the best weed preventing results, we recommend applying a heavy layer of weed killer to the surface before laying the road base. This will not eliminate weeds entirely but will reduce the probability of growth.
During the loose soil removal process, cut 2 to 3 inches of grass and soil with a sod cutter. After the soil removal, remove and haul away the debris. It is important to cut the sod instead of damaging the surface because it will leave the lawn looking smooth graded and clean. If you dig with a landscaping rake instead of cut, the completed fake grass surface may become bumpy over time.
A smooth surface is very important when installing synthetic turf, especially when you're prepping the base for a putting green, when a smooth and level surface is required for a good ball roll.
Soil removal and artificial grass base preparation is the most strenuous part of the turf installation. This requires significant loading and unloading from the crew. If your project site has tricky accessibility or inclines in the excess of 3 or more steps, be prepared to be up-charged for this. Difficult access will increase the overall workload therefore will affect the overall cost of synthetic turf installation.
Plan ahead when it comes to irrigation and electrical. Typically when making the switch and replacing your lawn with turf, your main objective is to create an area that is high functioning at any time of the day. We highly recommend placing conduits and low voltage lighting to enhance your lawn space. This will also substantially extend the time you can spend in your backyard by creating enough lighting.
Once the surface has been cleared, another recommended add on is the installation of gopher wire. While this step is optional, it is recommended to protect the area if you have pest issues. Sloped or hilly areas are full of gophers and tend to be at most risk. To prevent gophers and other pests, lay wire mesh down on the surface of the space to create a "cage" with no exposed dirt that gophers can crawl through. Without this turf add-on, you may be looking at costly future repairs!
Landscape edging is vital to the installation because it supports the base material. Any area on the perimeter that doesn't have existing edging or a hardscape such as concrete or wood as support will require some sort of bender board installation.
Bender boards are installed to separate artificial turf from planters in areas with a curved landscape, while treated wood boards are used in landscape areas with straight lines. Treated wood is chemically treated to maintain its integrity in the soil. For commercial areas or for added durability, you can also upgrade to aluminum bender boards.

After soil removal, you can lay the turf base material and begin the compaction process. Some believe decomposed granite alone is the best base material for artificial grass, but this is not true. Professional turf installers will use a strong class II road base that is recommended by manufacturers and only use a thin layer of decomposed granite, if any at all, to help smooth the top of the surface.
The only instance we recommend decomposed granite if it is fairly difficult to access the area. In this situation, your crew may build a frame so it acts as a membrane for support, this will also remove the use of nails all together. The turf will stapled to the frame using heavy-duty commercial-grade staples.
Also, if you're installing artificial grass DIY, decomposed granite may be your only turf base option because using road base requires professional tools that are not something most homeowners can get ahold of without pricy rental fees. In this case, use decomposed granite but add a DG stabilizer to strengthen the base. Without a stabilizer, the synthetic turf base will fall apart.When a customer opts in for a pet-friendly turf system, you'll need to create an artificial lawn with advanced drainage and simply cleaning in mind. To keep the area bacteria and odor free, there are a few extra steps during base preparation for pet turf.
First of all, you'll want to completely avoid a weed barrier in during pet turf installation. It will soak up urine and house bacteria.
To build a pet-friendly synthetic lawn, you'll want to install a drainage layer over the base prior to laying down the artificial grass. This drainage cell, Drain Core, is 5 mm tall and creates an air void between the base and the grass to allow for quicker drainage. With adequate drainage and consistent rinsing and sanitizing, your dog friendly artificial grass will be in good shape for years!
We'd also recommend laying a thin layer of turf deodorizer on the base before installing your drainage grid. This deodorizer helps control the lingering smell from pet relief. Artificial grass deodorizer traps and locks in odors until you're able to flush out the area!
The use of antibacterial sand infill in pet-friendly turf will also restrain the growth of bacteria, achieving a cleaner and cooler pet turf surface. However infill won't be added until the very end of your fake grass project.
Now that the base is smoothly graded and compacted, the surface is ready for artificial turf installation. Make sure to leave the artificial grass rolls out in the sun before cutting, giving them time to adapt to the environment.
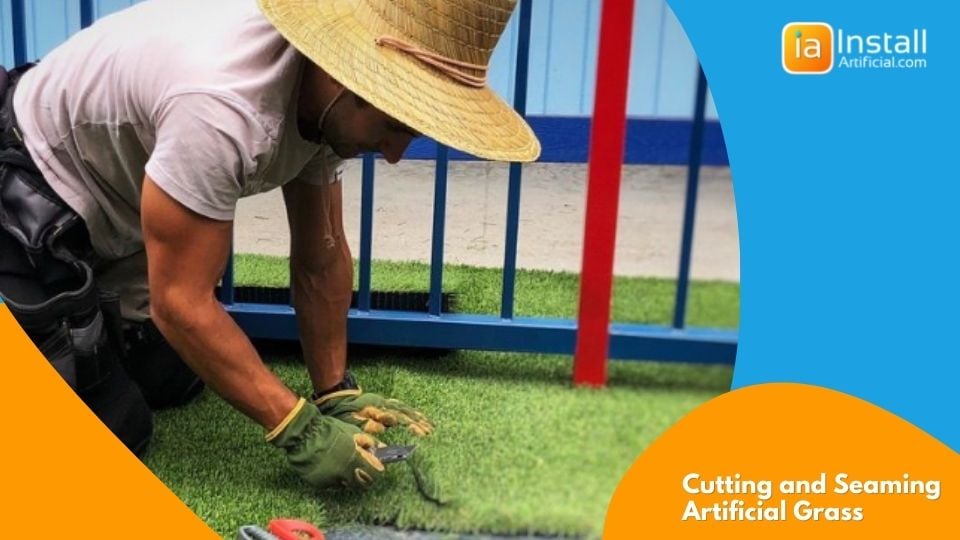
Once measured and cut to size, the artificial pieces should be aligned to prepare for seaming. It's very important to make sure the grass blades of each piece are facing the same direction With the use of professional adhesive, the grass will glued together and prepared for stretching. Licensed installers should equipped with professional stretchers to maximize efficiency. If your contractor is not stretching the turf material with professional tools, but rather with their hands, you should be asking questions. Without being stretched correctly the surface will wrinkle and buckle over time as the temperature fluctuates.
After trimming the edges you can begin using non-galvanized nails to secure the synthetic grass to the base surface. There should be nails throughout the entire surface every 2 feet, and every 2 in. on the perimeter to reduce stress on the turf caused by temperature fluctuations. Make sure your crew double-checks all nails for full contact before moving on.
For children and ultimate pet-friendly turf installation, a frame should be installed around the perimeter and the artificial grass will be stapled to the frame. For commercial projects, we must recommend a nail-free installation to keep all occupants safe when not supervised.
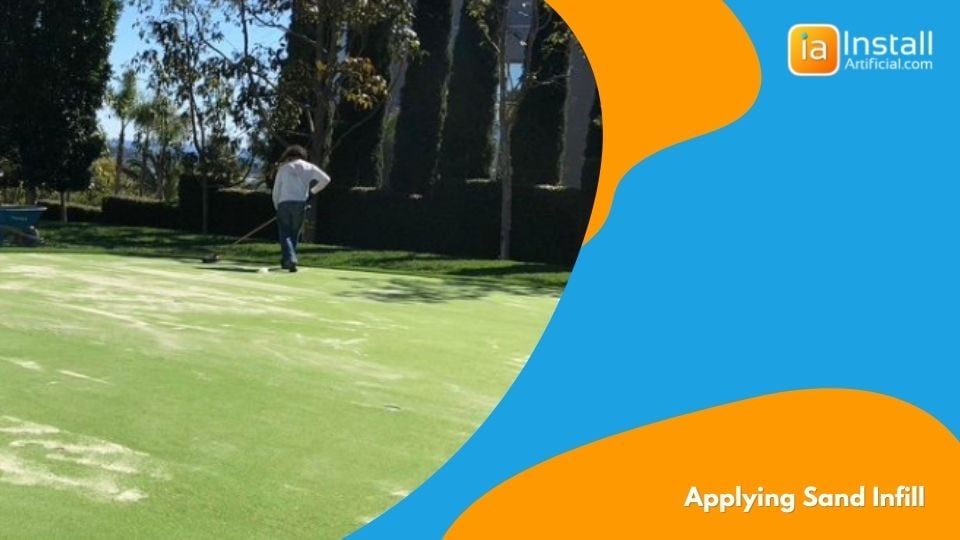
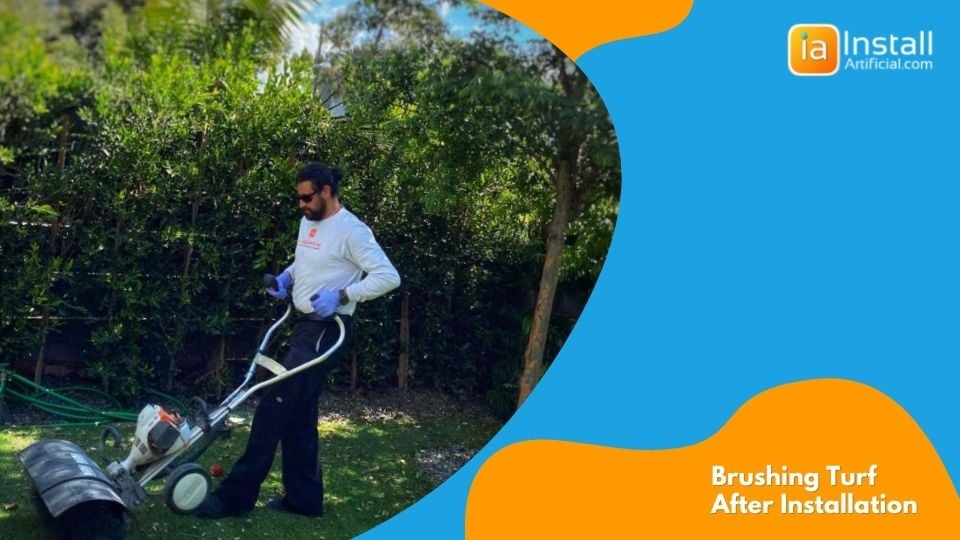
After the safety inspection and sand infill application is complete, the crew will brush and clean the artificial lawn entirely with a power broom. This is important to bring the lawn to life so to speak. The broom will push the infill down towards the backing of the grass and fluff up all the turf blades so they're standing upright. You get a brand new lawn ready to roll!
For light artificial grass cleaning, we recommend using a leaf blower or stiff-bristled broom and then rinsing with water. For even better results, use a pressure washer. When power washing your turf, keep the nozzle at least 1 ft away from your artificial grass. As a best practice, we suggest using a sanitizer. For pet-friendly artificial grass areas, we recommend a more in-depth cleaning process that you can read more about in the Pet-Friendly Turf category.
And there you have it! A guide to the installation steps when opting for artificial grass in your backyard. We recommend going with an experienced and efficient crew for the best results. A beautiful and inviting backyard design is not so far out of reach switching to artificial grass. To have peace of mind working with InstallArtificial, request a free estimate below!
When preparing to lay artificial grass, it's important to start with a clean slate. This means removing any existing natural grass and digging down about 2-3 inches to remove the top layer of soil. To prevent any future weed growth, apply a generous amount of weed killer before moving on to the next step.
Once the area is prepped, it's time to lay the base layer. You have two options here: Class II Road Base or Decomposed Granite. Whichever you choose, make sure to compact the base layer thoroughly to create a solid and stable foundation for your artificial grass.
With the base layer in place, you can now consider adding any additional accessories such as drainage grids or padding layers if desired. For those opting for Pet Turf, it's highly recommended to include a drainage layer beneath the artificial grass to facilitate water flow and ventilation, keeping the area clean and odor-free.
By following these steps, you'll be well on your way to a beautiful and long-lasting artificial grass installation in your backyard. Don't forget to consult with experienced professionals to ensure the best results. Request a free estimate from InstallArtificial today and transform your outdoor space with peace of mind.
The cost of artificial grass materials is between $1.45 and $6.75 per square foot, while the cost of installing artificial turf ranges from $8.50 to $14.50 per square foot.
The cost of artificial grass installation can vary quite a bit depending on factors such as the scope of work, size of the area, and intended use of the artificial grass. On average, the price of installing synthetic grass professionally is between $8-15.
it is important to remove various materials to ensure a solid sub base for the project. This includes the removal of existing substances such as soil, weeds, and any other above-ground components. Additionally, the process involves uncovering and removing electric wiring, irrigation systems, pipes, and any other infrastructure that may be present below the surface. By thoroughly removing these materials, we can create a clean and stable foundation for the upcoming project.
During the pre-installation phase, it is crucial to address the wiring, electrical sprinklers, and any other relevant components in order to ensure their safety and prevent accidental damage. To begin, remove any existing materials above ground such as soil, weeds, or any other substances present. This process, known as demolition, will help in creating a solid sub base for the project.
Once the area has been rough graded and all existing materials have been cleared, it is important to uncover everything underneath, including electric wiring, irrigation systems, pipes, and so on. Carefully locating these elements, they should be moved inward and away from any hardscape or perimeter by a distance of six to eight inches. This step is important to prevent any unintentional damage to the wiring and other components when securing the turf edge with nails in subsequent steps.
After moving the wiring and related elements, lay them on top of the subgrade surfacing using u-nails. This ensures that the wiring remains safely positioned and secure throughout the installation process.
To cap existing sprinklers that will not be used, follow these steps:
1. Locate the sprinklers that you wish to cap.
2. Ensure that the cap is placed at the pipe level rather than the rising. This prevents any potential leakage between the two components.
3. Modify the sprinklers' irrigation or drainage systems as needed. This may involve relocating sprinklers, adjusting existing irrigation lines, or adding necessary drainage.
4. After making the necessary modifications, backfill the area around the capped sprinklers to ensure stability and proper ground level.
5. Lastly, mark the location of the unused sprinklers to avoid creating depressions or low spots in the future. This will help maintain the aesthetics of the area and prevent any potential tripping hazards.
Yes, you can install artificial grass yourself. In fact, in certain cases artificial turf is very DIY friendly.
In large commercial or high traffic areas, professional installation is recommended. In these spaces irrigation, drainage, and safety should be top of mind and nothing beats an expert crew and high quality materials.
The first step of installing artificial grass is removing the natural grass and a couple inches of soil from the area. From there, a heavy weed killer and solid base layer should be laid as your foundation. Drainage grids and padding layers can be laid on the surface if necessary prior to laying, stretching, and securing the artificial grass. Don't forget to apply infill and brush the surface to keep the blades upright.
Check out our in-depth article to learn more about artificial grass installation steps.
The cheapest way to lay artificial grass is to DIY the project. This can save you around $5 per sq. ft. However, it's important to use high quality materials to ensure your artificial lawn will last long term. Skimping on materials or hiring sketchy contractors who cut corners to do the job for cheap will result in visible seams, wrinkles, and uneven surfaces over time. All of these are safety hazards.
In some cases, artificial grass must be glued down but not unless you're installing it over a hard surface such as wood, concrete, or pavers. Even then, applying adhesive is not always necessary and can stain the surface upon removal. To avoid using glue, you can apply infill to weigh down the surface or use outdoor furniture and other objects to keep the turf from shifting.
When installing artificial grass over soil, you'll use nails to secure the artificial grass to the base layer. You can also opt out of using nails by installing a frame around the perimeter and stapling the grass to the frame. Nail-free turf installation is typically required in commercial spaces where children play.
Yes, pets can use the restroom on artificial grass. However, to prevent smell and bacteria from building up over time, it's essential to clean and sanitize the artificial grass consistently. For the best results, opt for short and durable artificial grass in backyards with pets. You'll also want to use premium antibacterial infills and deodorizer to keep your lawn fresh. A drainage layer beneath the surface can also help with water movement so urine can be flushed away.
Making the switch to artificial turf that's pet-friendly? Installing it yourself at home? We've created a DIY guide to assist you with your pet turf installation! It...
Updated on 02/13/2026