Learn the importance of sand infill in artificial grass installation projects. Hear the consequences of cutting corners and eliminating this step, and how it affects the...

The installation process consists of many vital steps to produce a successful and high-quality space. It’s important that these steps be followed to ensure you don't run into any issues along the way. This guide allows you to understand the entire process.
Once the project proposal is completed, we can then get to work. The first step is to grade the soil. This consists of removing 2-3 inches of soil and the grass on the surface. Once this is completed, we can move on to the next step.
The next step is to apply two inches of road base. The road base acts as a base layer for the grass, but also as a drainage system. After the road base is evenly spread, it gets compacted twice in two different directions so that the surface is smooth and even.
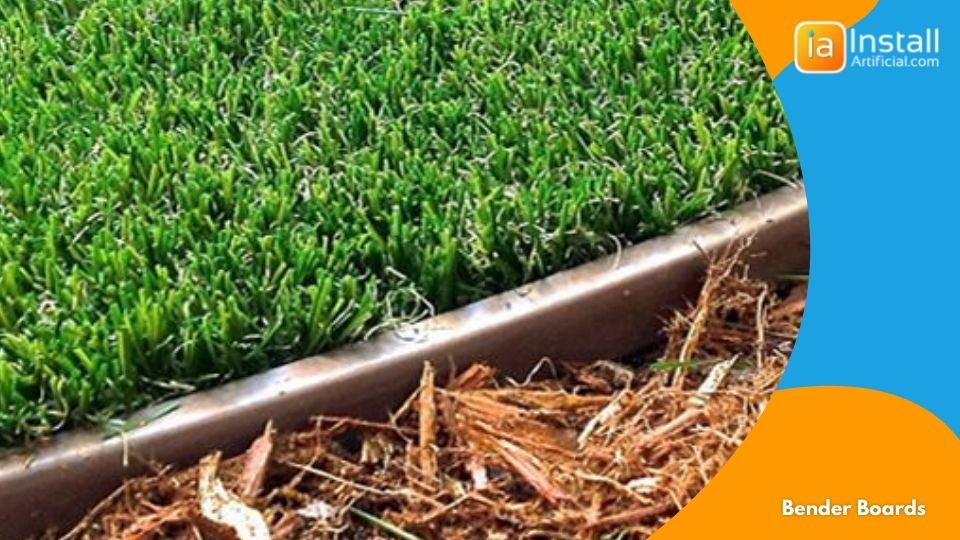
If your installation requires bender boards or treated wood boards, which many do, these will be installed next using plastic stakes. Bender boards are placed around the perimeter of the base to separate the turf from any planters or fences.
The grass will be laid out on top of the base. Once unrolled it must be left in the sun for 30 minutes to warm up. This helps when stretching the material which is the next step. The installers should stretch the grass in different directions to help it relax and adapt to the area.
Once the grass is warm and stretched, the crew will go ahead and begin attaching the grass to the surface. The artificial grass will be nailed down every two inches on the perimeter and every two feet throughout the surface. The areas with seams will get taped down, not nailed so that they don’t bunch up and cause problems. The crew should also make sure to install the grass so the blades are all facing the same direction.
The team will double-check that all nails are safely flush against the ground and not sticking up causing a safety hazard. After this, our crew will brush the artificial grass with a professional-grade broom. This is to make the blades stick straight upright and look aesthetically pleasing. This will also ensure that any missed nails are discarded.
Even though it seems installation is complete, there’s still clean-up to do. The crew will clean up the area in detail. We’re the ones who made the mess so we should be cleaning up, not you! We want you to start enjoying your new yard as soon as we leave.
There are a few optional add-ons that can be embedded in this process if you choose those features. If you request a weed barrier cloth or padding system, that will be placed directly under the turf. Also, a drainage system can be installed above the road base.
And there you have it! A step-by-step guide for installing artificial turf. This process is generally the same with all of our installations but can vary depending on the type of project, size, etc. We hope that this helps you keep track of your future installation process!

Learn the importance of sand infill in artificial grass installation projects. Hear the consequences of cutting corners and eliminating this step, and how it affects the...
InstallArtificial was established in 2016. Since its creation, it has expanded to two construction teams that install artificial grass all over Los Angeles. We also work...