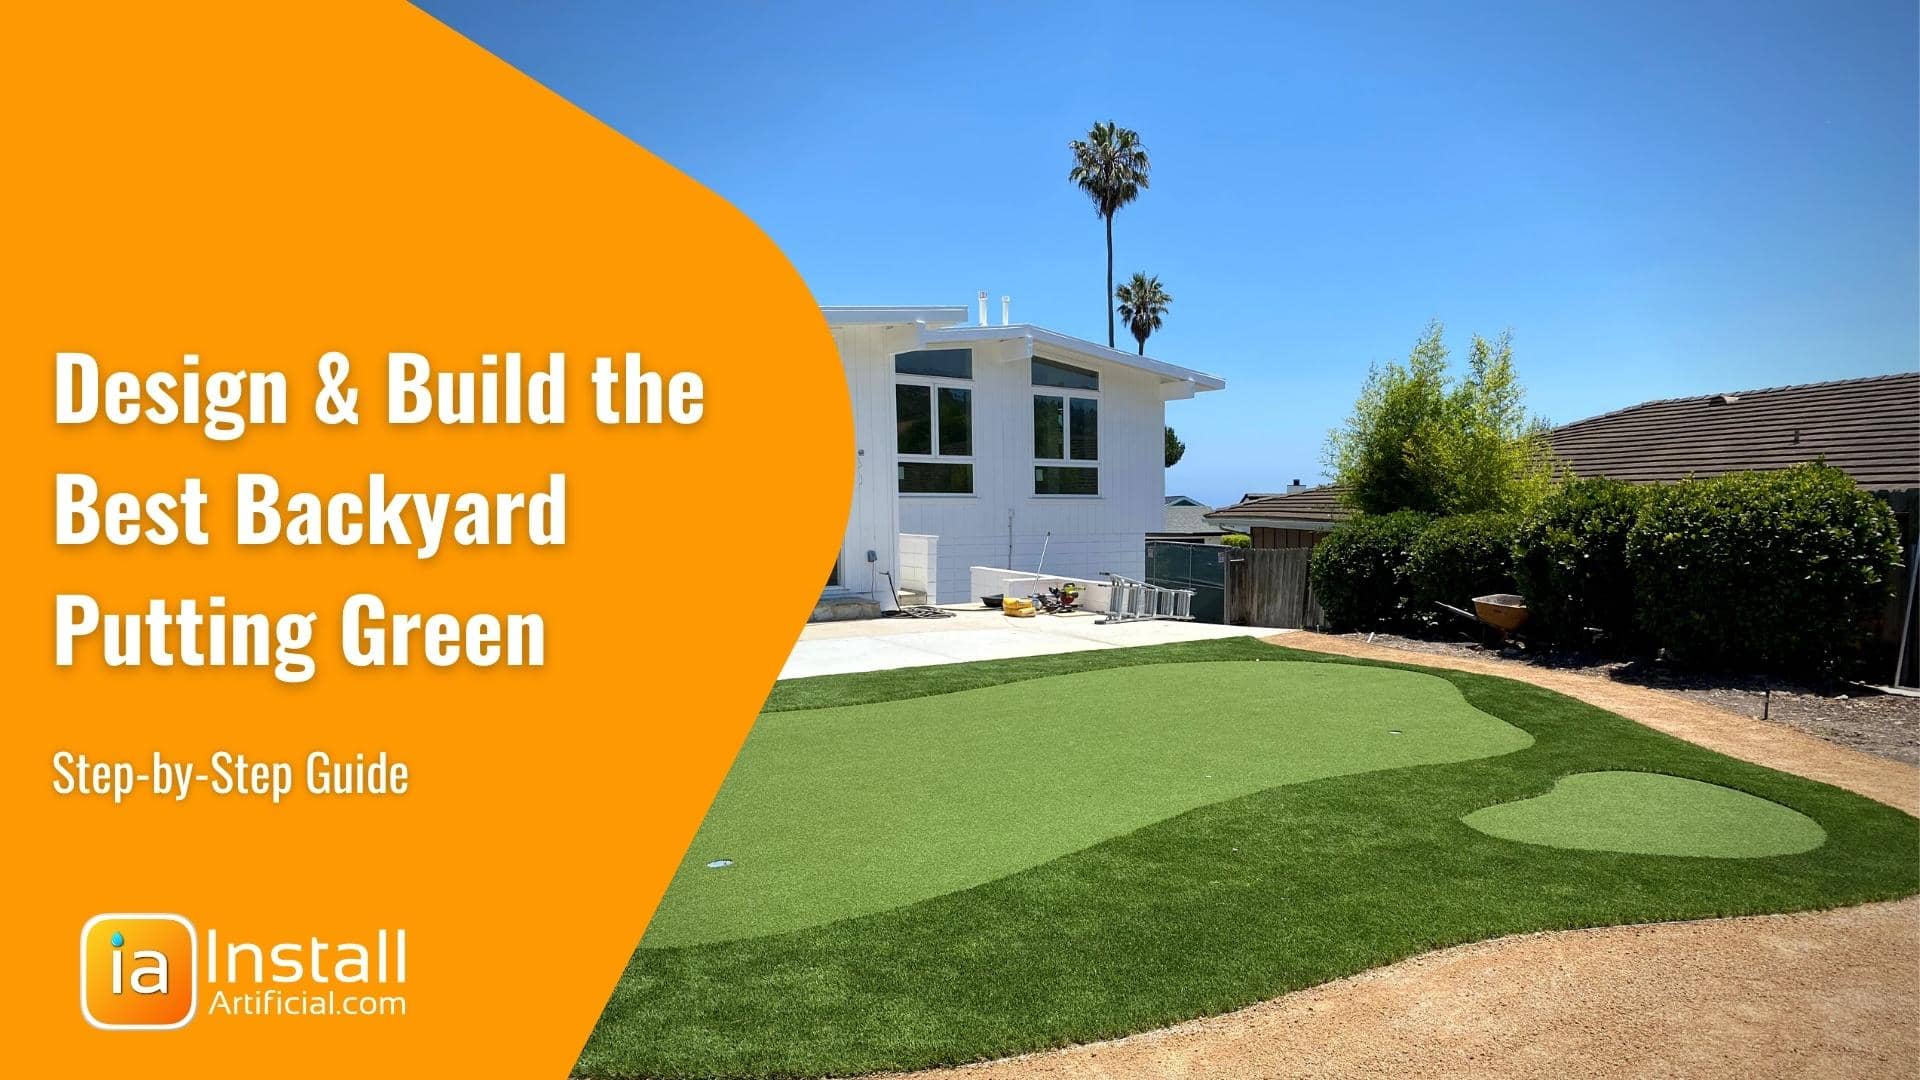
Building, designing, and customizing a synthetic putting green in your backyard can be just as exciting as actually playing on it. Embrace this project and make sure...


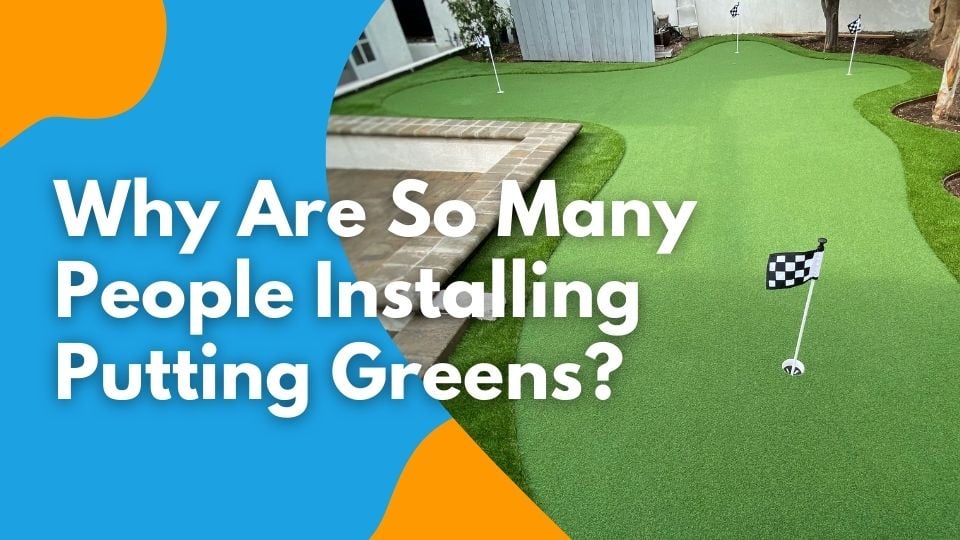
Artificial putting greens have become more and more common among commercial properties for many reasons. But what many people don't realize, is that it's an excellent addition to residential spaces as well. Outdoor putting greens in your own backyard may seem like a luxury, but avid golfers will love the convenience. It'll also be a hit with guests. So why are more people opting into artificial putting greens?
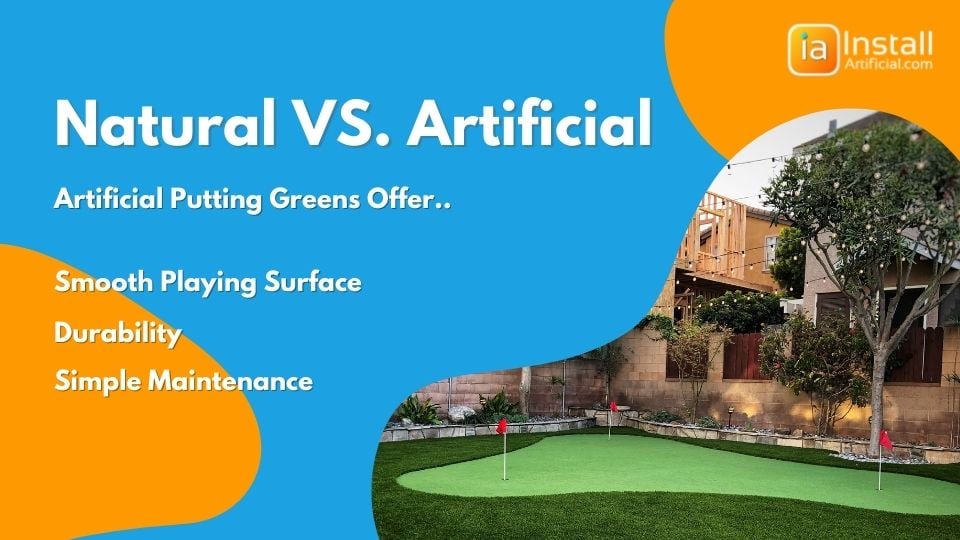
Successful use of natural grass for putting greens depends on the type of soil, the climate where it is being used, and the amount of sunlight it receives. If you don't have a well-drained lawn, it won't be a success. Synthetic turf can be installed almost anywhere and can look its best in any shade. This means that you can install your golf green even in shady areas, in a yard that doesn't get much sun, or in a section of your yard that doesn't provide healthy soil.
Artificial putting greens will not experience broken blades or a stepped-on look after moderate traffic. There will be no dead or bare areas from too much traffic or activity. The above-mentioned easily become problems with natural grass. Also, natural grass tends to become quickly damaged by putters during play. After putting time and money into a new putting green, the last thing you want to worry about is damaging the surface with one swing.
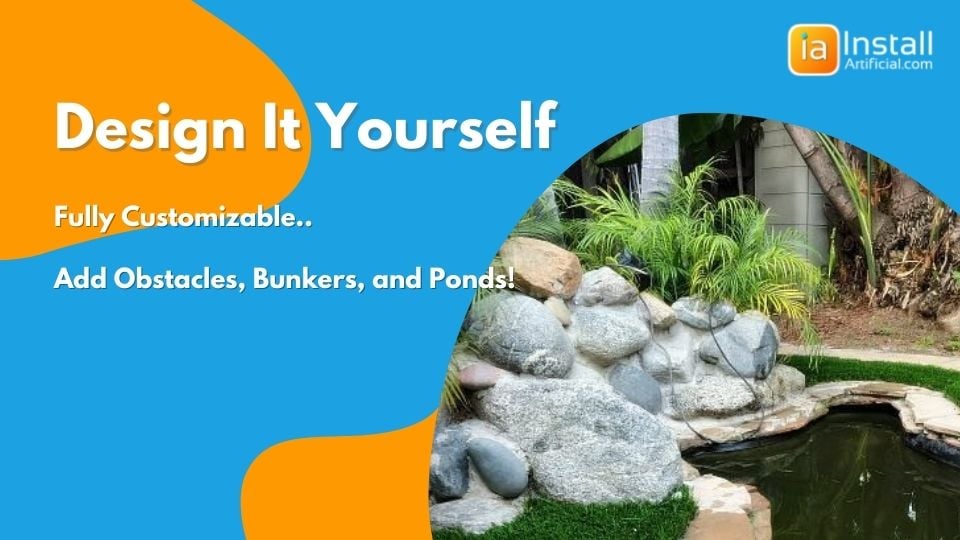
Your freshly installed putting green does not have to be flat and boring. We offer a variety of customizations that can improve your game. If you're stuck on how to make a putting green that's right for you, let us help you with the design process. The area can be designed to create a challenging course that is fun to play with your friends and family.
We can strategically place cups, shelves, undulations, dry creeks, and bunkers to give you an authentic-looking game. Because your artificial putting green won't have bumps and divots that are inevitable with natural grass, the area will be a lot more visually appealing as well.
 Safety on Artificial Putting Greens
Artificial turf will provide an even and consistent playing surface without holes, divots, or clumps. Natural grass is more often than not bumpy and it can be hard to maintain a uniform surface. This can be due to wear, pet relief, environmental changes, or simply the way that natural grass grows. Because of this, artificial putting greens are considered the safer option in regard to the risk of tripping.
Installing conventional grass comes with a long list of maintenance duties. Watering, weeding, fertilizing, edging, and mowing to just name a few. When maintaining a putting green, this upkeep is even more important because it will affect the gameplay. Artificial grass for putting greens is a low-maintenance option that requires little work and always looks its best.
The design and size of your putting green are completely up to you. You can keep it simple or include practice elements such as hitting mats, large boxes, ponds, or a creek bed. You can also practice off the green with grass bunkers and sand berm bunkers.
When installing putting green lawns, it is important to select the correct grass materials. The putting green turf you choose should directly reflect your gameplay and personal preferences. A longer pile system is typically chosen by avid golfers who want to adjust the speed of their course. Longer piles also offer a closer comparison to a natural green. Lower piles offer consistency, but less flexibility.
Most materials for backyard putting greens are designed to provide consistent ball roll and natural reaction. Putt pads support longer shots, help deaden the ball, and serve great for chipping. Use materials with proven technology and consistent performance, reference client reviews and consult your installer for their recommendations.
Preparing the ground for an artificial putting green is crucial for ensuring a smooth and optimal playing surface. Here is a step-by-step guide to help you properly prepare the ground:
1. Level the Surface: Begin by ensuring that the ground is flat and even. You may need to break up any large lumps of clay or use gravel, sand, or topsoil to level out any uneven areas. This will help the turf lay smoothly and provide consistent ball roll.
2. Remove Obstacles: Clear the area from any large rocks, roots, sprinklers, or other objects that may get in the way of the putting green. These obstacles can hinder the installation process and negatively impact the playing experience.
3. Clean the Ground: Use a rake or shovel to level out the synthetic putting green site and remove any remaining dirt clods. This will help create a clean and debris-free surface for the artificial turf.
4. Address Drainage Issues: Proper drainage is essential to prevent flooding, puddles, mold, and mildew on the putting green. Ensure that the ground is properly sloped to allow water to drain away efficiently. Consider using a drainage system or creating a slight slope to prevent water accumulation.
5. Address Pest and Weed Control: Apply insecticides to eliminate any potential pest issues that may impact the turf. Additionally, apply a weed killer to prevent weeds from growing through the turf backing and spoiling the playing surface.
6. Ensure a Wrinkle-Free Installation: Take extra care to ensure the putting green is free from wrinkles. Any wrinkles on the surface can negatively affect the ball roll and overall playing experience. Smooth out the turf carefully during the installation process to avoid any unsightly wrinkles. Use 2 inches of road base and compact the area. For the best results, a thin layer of DG on top of your base can create an even smoother surface.
By following these steps and taking the necessary precautions, you can create an ideal foundation for your artificial putting green. Proper ground preparation will not only enhance your game but also ensure the longevity of the artificial grass, allowing you to enjoy your putting green for many years to come. Learn more below!
The first step to an artificial green installation is to remove the soil in the area where we're laying the putting green. For backyards, this can be as simple as cutting a few inches of sod. In larger projects, tree removal and the construction of retaining walls may be necessary. Prior to base preparation, all edging should be installed. For putting green installation, we recommend aluminum bender boards to better support the base!
Once the land has been cleared and leveled, a compacting machine is used to level the ground or build contours around the edges. You'll apply approximately 2 inches of class II road base and compact the area. A layer of decomposed granite is also added to the base to ensure the surface is fully smooth and level.
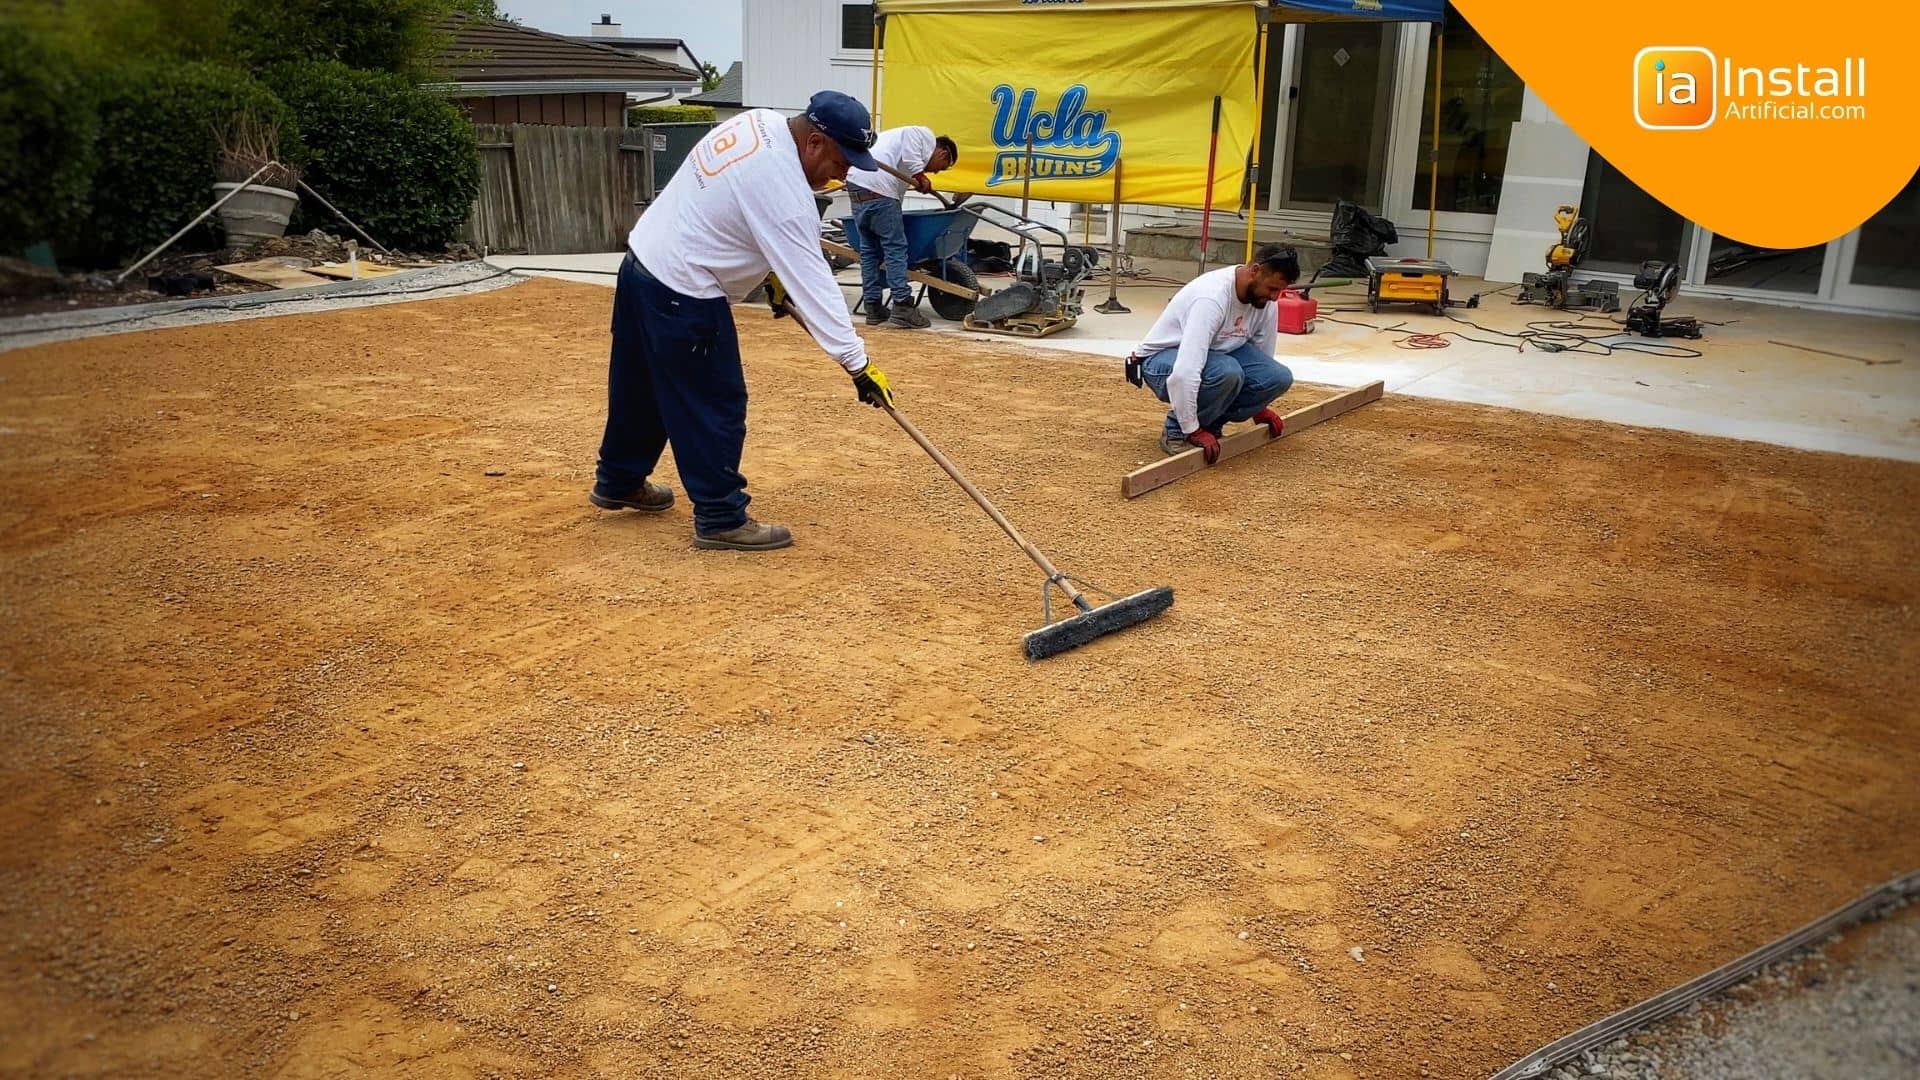
Because artificial putting greens require greater expertise in grading and leveling to provide adequate gameplay, it's not recommended to DIY these types of projects. It's also during this base prep and ground compaction step that we can build additional contours and shapes into your putting green.
With the freedom to customize your artificial backyard green, you can install as many, or as few plastic cups as you'd like depending on the size of your space. These are installed directly into the concrete base to ensure they stay put. It is critical that these plastic cups are level for proper flag placement.

Once the area is compacted and the putting green base is prepped, you can now move on to the installation. While it seems that the hard part is over, there are still precautions to take to maintain the integrity of your putting green.
You'll have a longer fringe grass and the putting green material to contour and cut to size. Cut the turf and shape it to the area before seaming with adhesive. The turf is then stretched and secured to the base with nails every 2 inches on the border, and every 2 feet throughout the surface. Below are a few best practices when it comes to installation:
We offer the option to make your putting green installation fully nail-free. In this scenario, we install a frame around the perimeter of the putting green prior to base preparation. Rather than nail the turf directly to the base, we staple it to the frame. This is the best way to prevent nail removal over time. While we always recommend this for commercial or public putting greens, it's a great idea to keep children and pets safe in residential backyards as well.
The most common defect in putting greens is the surface wrinkling and buckling over time. It is very important that the putting green turf material is stretched tightly across the perimeter before being secured to prevent this from happening. It's not enough to stretch with your hands, you won't be able to apply enough pressure. We use professional stretching machines to pull in every direction before securing the turf to the base. Because of the need for professional tools, it can be tricky to build a high-quality DIY putting green.
When installing putting greens, you want to make sure the seams aren't visible. Visible seams can over time damage the surface and become a safety risk. After we cut and shape the turf, we use a zipper effect to create an optical illusion for the eye. This will create a seamless look. Correctly seaming the turf is critical especially on warmer days, because the putting green will want to expand. When selecting backyard putting green installers, make sure to ask them how they seam the grass.
Applying a proper layer of sand infill to your putting green is very important. The weight of the infill will help prevent wrinkling. We make sure the infill is evenly spread out using enough to keep it standing on its own, but not too much that will cause excess wear or impact absorption. The sand should fill the voids in the fibers without creating an uneven surface for the ball.
For more information on the installation process, you can reference our article How to Install Artificial Grass!
We would be lying if we said that there is no maintenance required for putting greens and artificial grass. The surface still needs to be cleaned and brushed periodically. However, it's still much simpler to maintain than conventional grass. You'll be able to blow the leaves away and brush off any dirt with ease.
Depending on how often you use this space for recreation purposes, our specialists can arrange a brushing service in order to make sure all edges are upright and looking their best! When you are concerned about maintenance, we highly recommend choosing more durable commercial-grade putting green materials. Most commercial-grade materials feel a bit harder, but they are easier to maintain.
When it comes to enhancing the best putting greens, there are numerous features that can be added to elevate the experience. These additions not only add excitement and challenge to the game but also provide opportunities for creativity and personalization. Consider the following features for your DIY putting green:
1. Sand traps: To create a sand trap, you can dig out sand from the chosen site and create sunken areas that serve as obstacles. These areas will challenge players and require strategic thinking to navigate.
2. Water hazards: Add a touch of complexity with water hazards. Using items like a kiddie pool, bricks, stones, or even an old tire filled with water, you can introduce an element of risk that players must carefully navigate.
3. Bunkers: Cement bunkers, when installed correctly, provide a realistic and challenging experience for golfers. Though the process may require working with heavy equipment like a vibrating plate compactor, determined DIY-ers can create their own cement bunkers.
4. Hills and slopes: With a bit of creativity, you can mold artificial turf into hills with steep slopes and gentle inclines. Gather inspiration from professional golf courses near you and incorporate these undulations into your DIY putting green.
5. Elevated tee box: Consider the addition of an elevated tee box to change the game and provide a fresh challenge for golfers. Constructing or finding an elevated tee box will require time and effort, but the rewards in terms of gameplay variation will be worth it.
6. Stray shot catchers: Building or purchasing a sand bunker or infill material catcher can prevent stray shots from going off the green. This feature ensures that golfers have a designated area to retrieve and continue their game.
Remember, the possibilities are endless when it comes to utilizing artificial grass, your DIY skills, and a touch of creativity. If you're in search of artificial putting green installation near me, don't hesitate to seek assistance or advice from professionals like our team at InstallArtificial. We'll be more than happy to guide you through the process and help bring your vision to life.
When considering the installation of shock pads under your artificial putting green, it is important to note that they are not essential for achieving the best putting experience. Shock pads primarily serve to absorb impact, providing a softer surface for activities like playgrounds. However, if you desire additional cushioning for your putting green or are seeking a visually attractive finishing touch, foam padding can be a beneficial option.
To learn more about foam shock pads and their application in various turf installations, including artificial putting greens, we encourage you to explore our comprehensive guide: Underlayment Pad Options for Turf
To successfully install your own synthetic putting green, you don't need a wide array of complicated tools or equipment. In fact, you probably already have most of what you need in your garden shed. Keep in mind that because the project can get complicated and a level surface is important, it is recommended to use professional installers. However, if you're up for the challenge here is a comprehensive list of the tools and equipment you will need for DIY synthetic putting green installation:
1. Putting green artificial grass: Ensure you get the best quality artificial grass suitable for putting greens.
2. Seam tape: Used to join different sections of the artificial grass seamlessly.
3. Shears: Essential for cutting the turf to the desired size and shape.
4. Utility knife: Used for precision cutting and trimming during installation.
5. Rubber mallet: Helps in securing the artificial grass and ensuring proper alignment.
6. Shovel: Useful for digging and leveling the ground before installation.
7. Broom and dustpan: Used to sweep and clean the area before and after installation.
8. Scissors: Necessary for trimming any loose strands of grass that may arise during the installation process.
9. Wheelbarrow: For transporting materials and tools around the project site.
10. Sod cutter: Helps in removing existing grass or vegetation from the installation area.
11. Vibrating plate compactor: Used to compact and level the soil surface for a stable base.
12. Rake: Essential for leveling the ground and preparing it for the synthetic turf.
13. Glue: Required for adhering the different sections of artificial grass together.
14. Tape measure: Helps ensure accurate measurements during installation.
15. Push broom: Used to brush and fluff up the artificial turf fibers.
16. Stakes: Used for securing the edges of the artificial grass.
17. Measuring tape: Helps in measuring and marking the installation area accurately.
18. Water hose: Needed for watering the area and ensuring proper settling of the artificial grass.
19. Infill: Used to enhance the durability, stability, and appearance of the putting green.
20. Base material: Road base or decomposed granite will be needed to create a smooth and level playing surface.
20. Artificial grass accessories: Such as flags, poles, golf cup caps, ball return system, etc., to enhance the playing experience and aesthetic appeal of the putting green. Most of these tools are readily available and easy to find.
Putting green systems are some of the most popular artificial surfaces we install. Whether you're looking to create a small training station or a league-sized space, we can put together an attractive, full-service artificial putting green system that's sure to please golfers of all skill levels. Let us take care of everything, request an estimate today!

Building, designing, and customizing a synthetic putting green in your backyard can be just as exciting as actually playing on it. Embrace this project and make sure...
Learn why customers are opting for artificial putting green installation in their backyards and commercial spaces. Hear the entertainment benefits of this addition, and...