Polypropylene vs. Nylon putting green is a large debate among installers and contractors in the turf industry. Which putting green material is best for realistic golf...

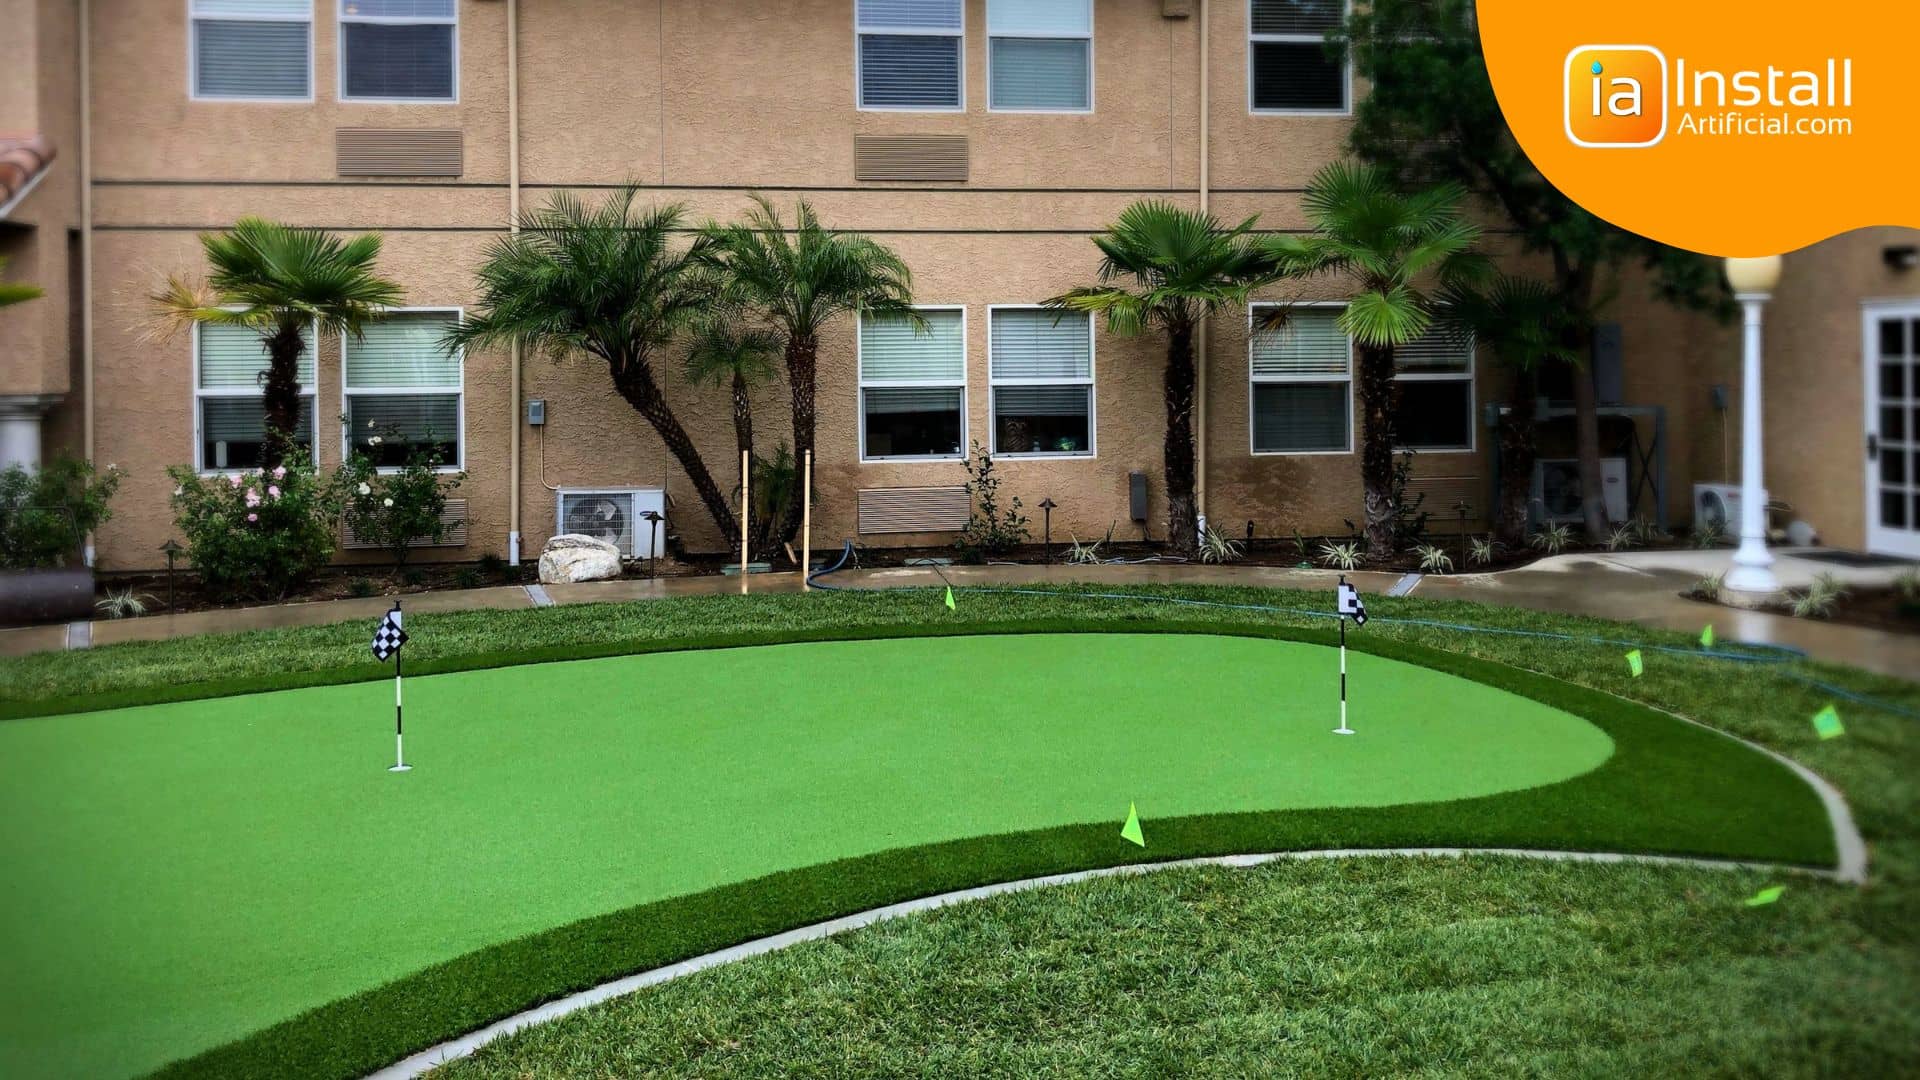
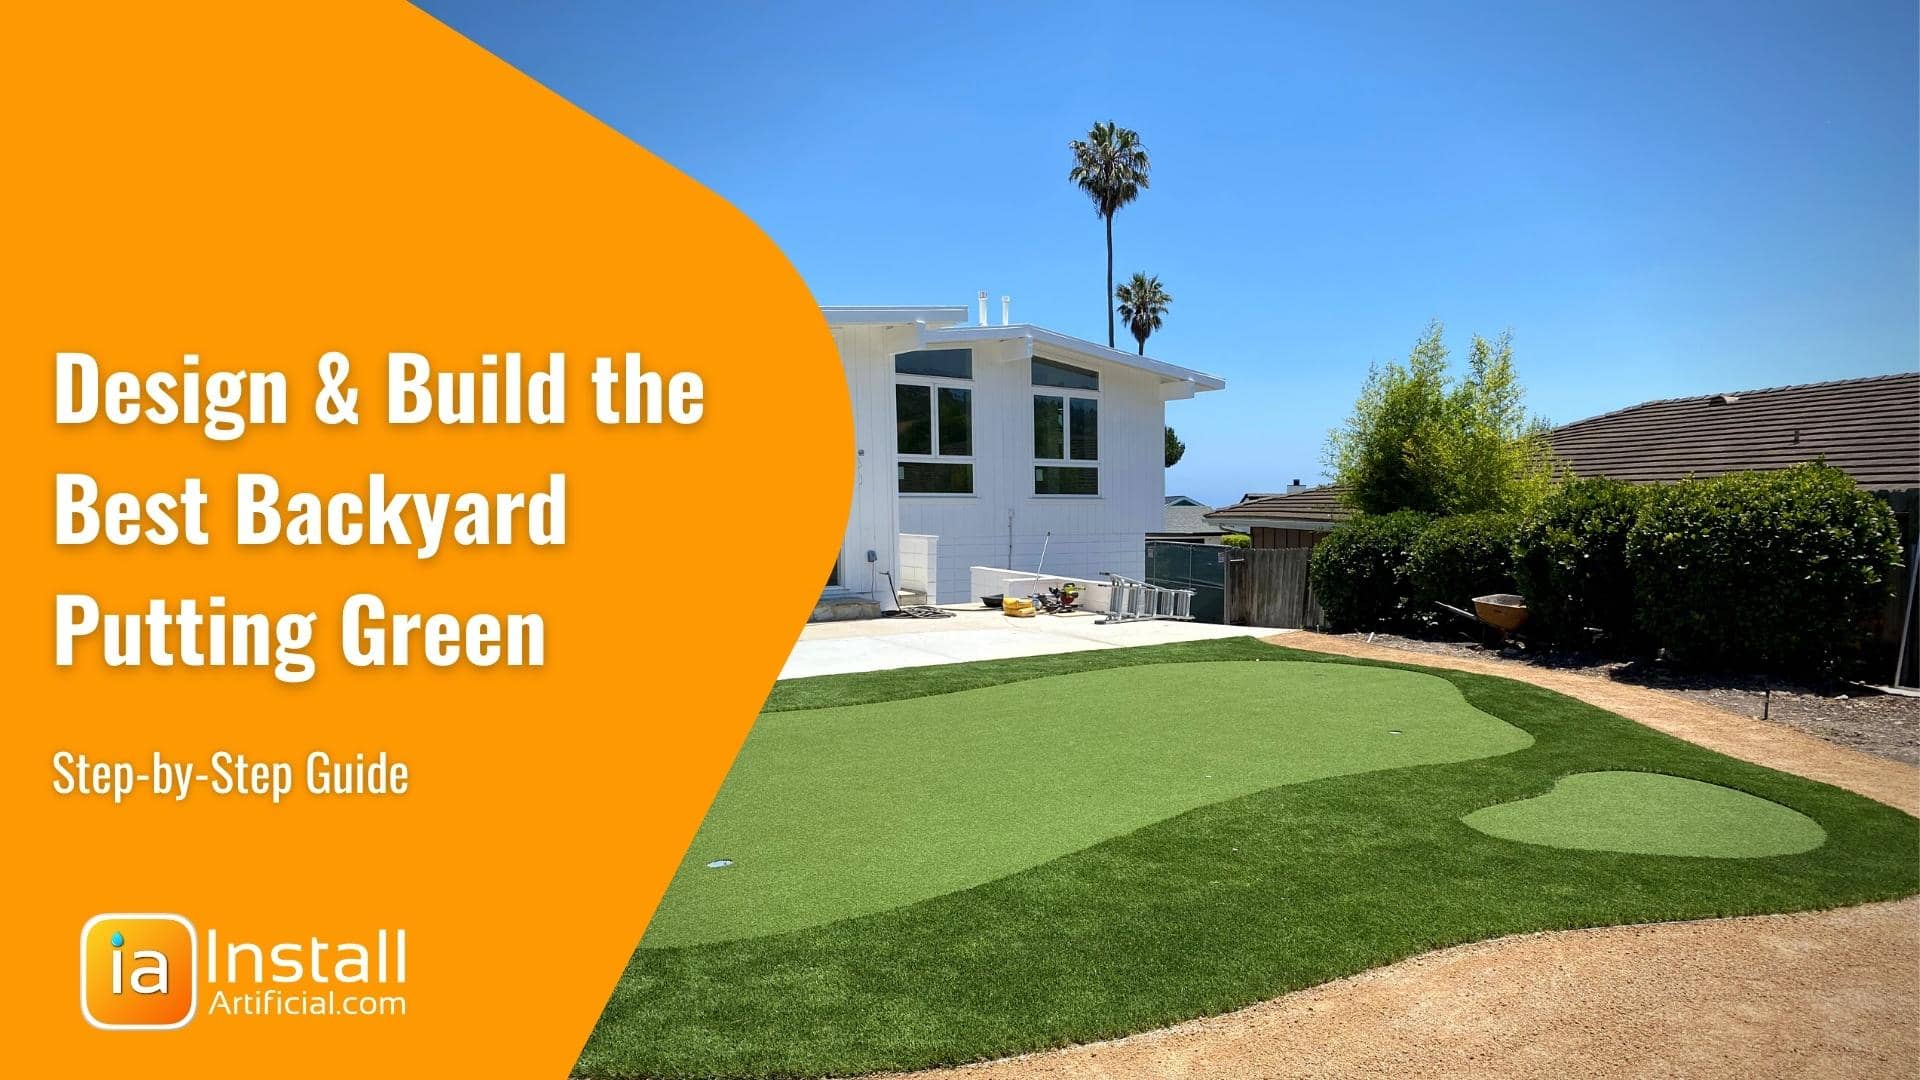
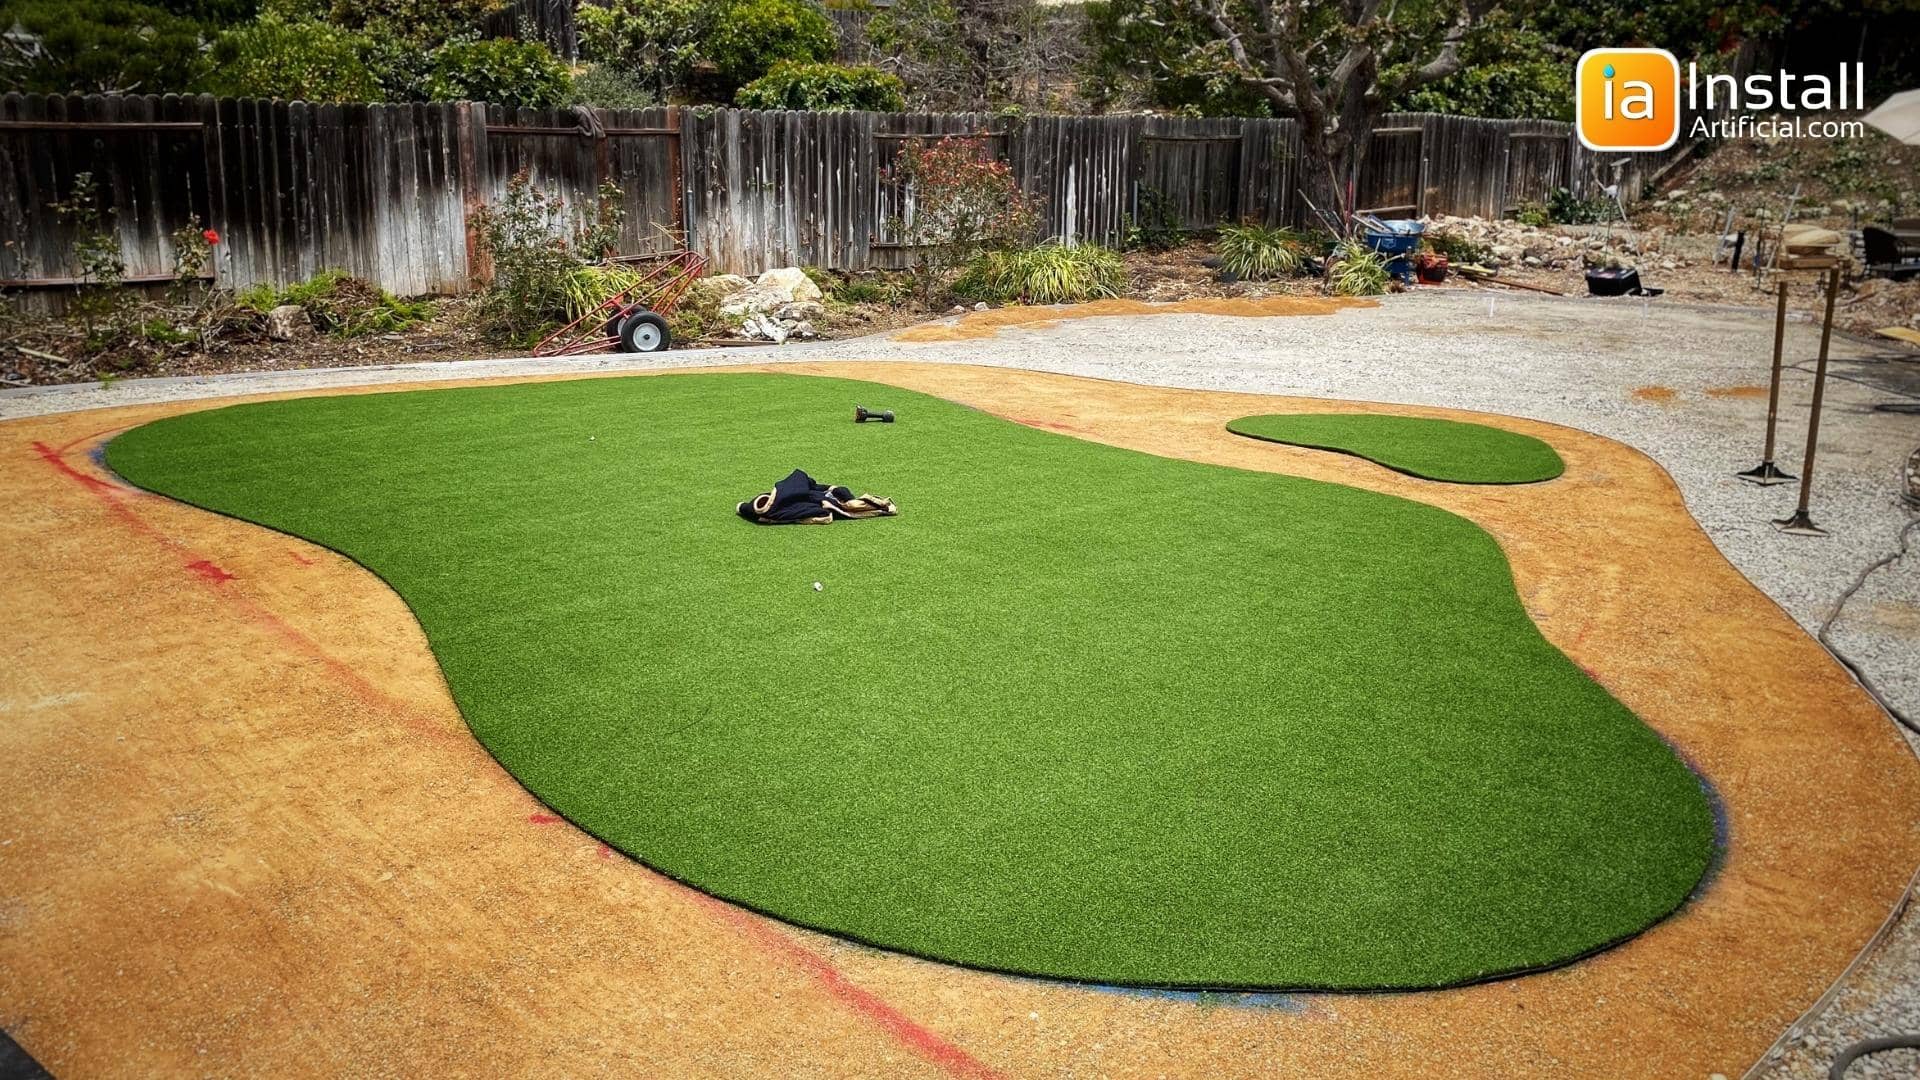
Building, designing, and customizing a synthetic putting green in your backyard can be just as exciting as actually playing on it. Embrace this project and make sure each detail is compatible with your gameplay to get the most from your outdoor backyard golf green. Reference our step-by-step process below to guide you while building your outdoor putting green with a pro artificial grass installer or diy!
1. Determine the Dedicated Area for Installation
2. Draft the Shape of the Putting Green
4. Position the Cups and Launch Areas
5. Select Additional Starting Points
6. Twist the Shape of Your Putting Green Surface
7. Select the Putting Green Materials
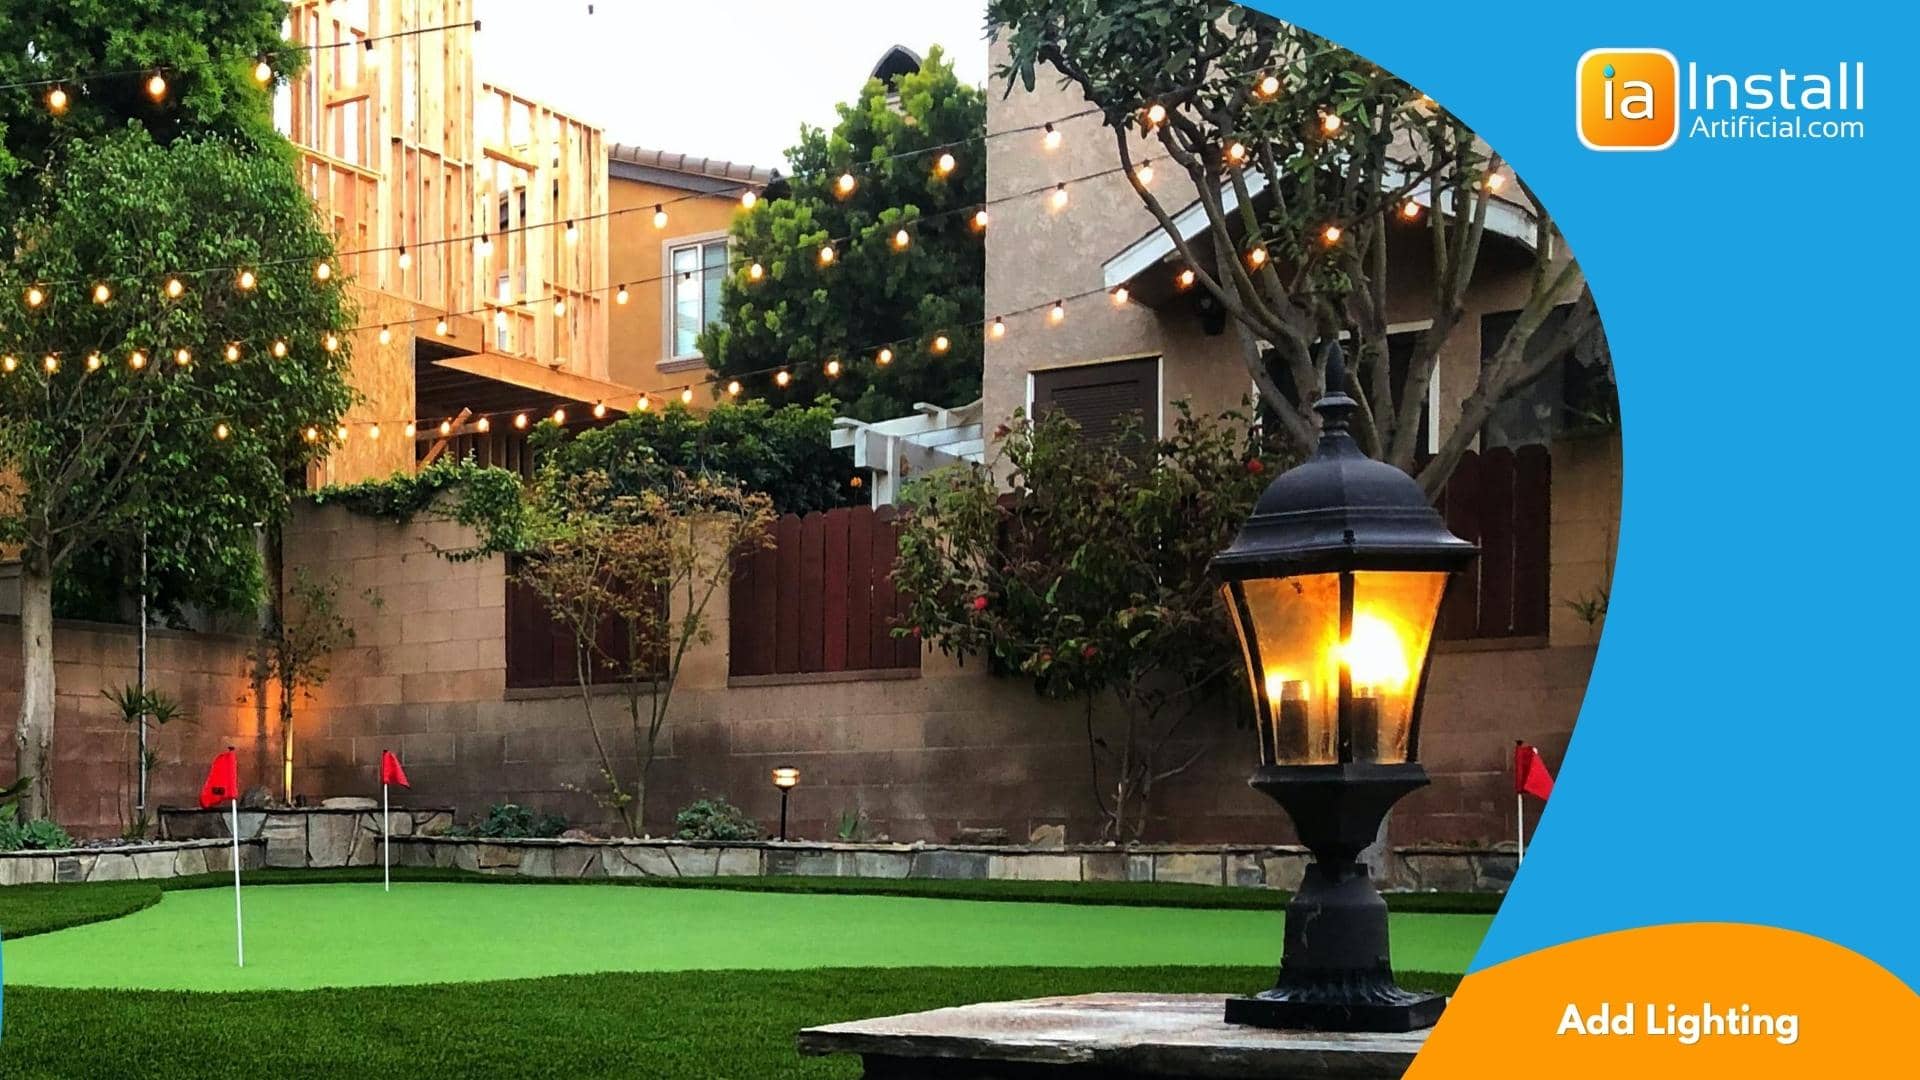
8. Consider Additional Lighting
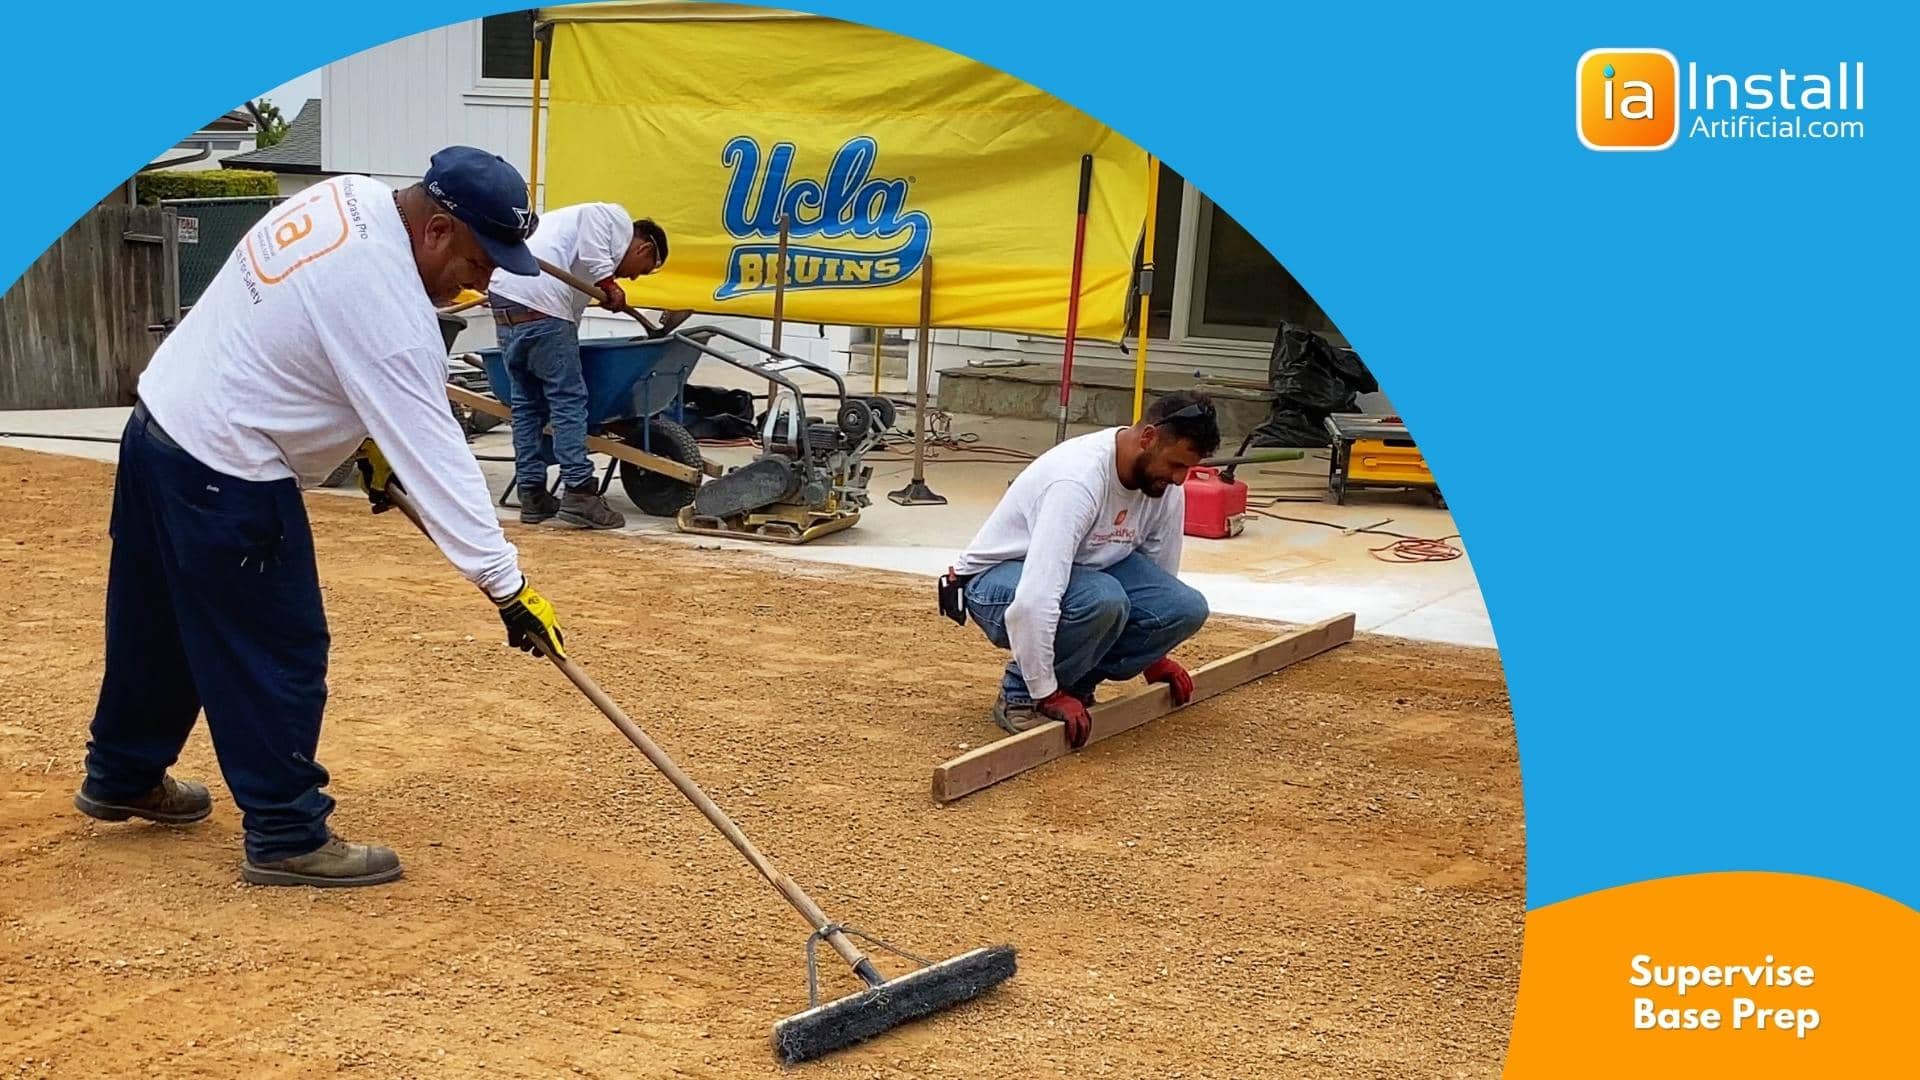
9. Understanding How to Supervise Putting Green Installation
10. Finding a Contractor to Build Backyard Putting Green
11. What to Expect During Putting Green Installation
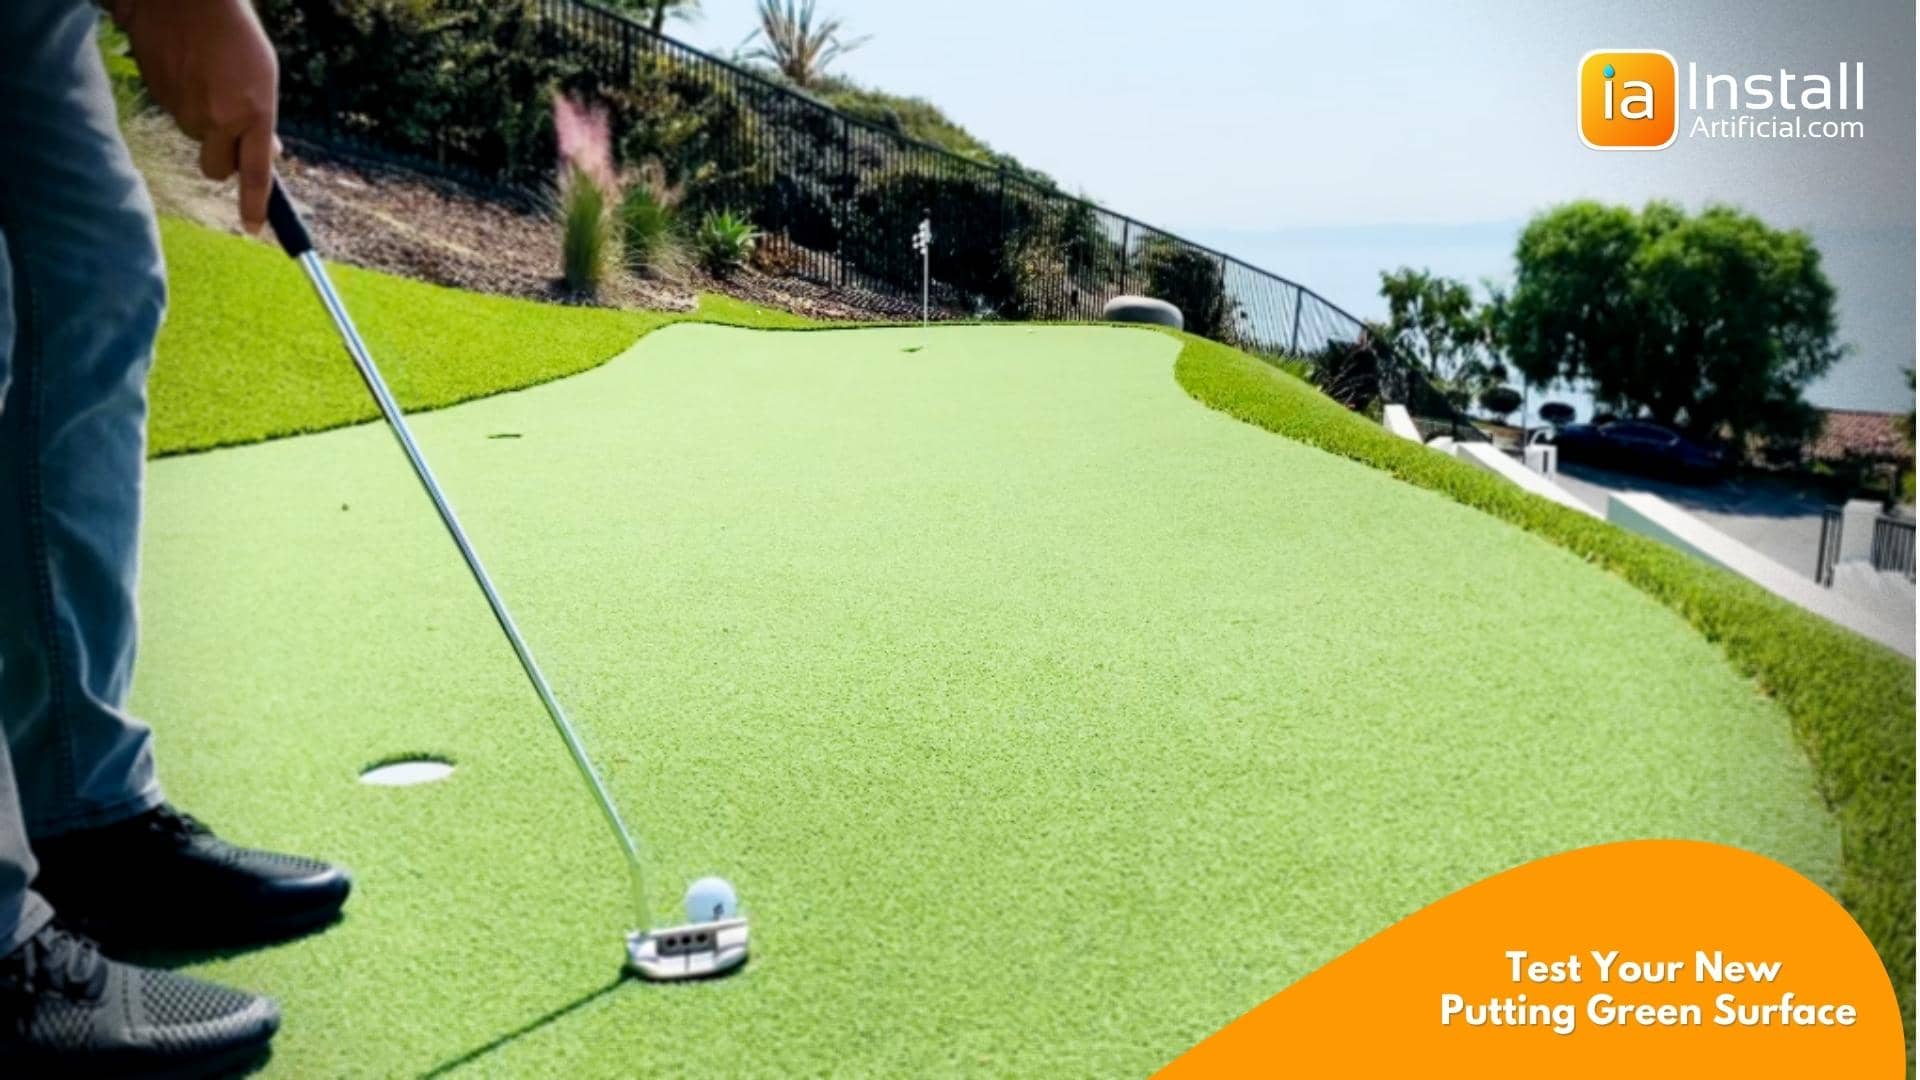
12. Test Your New Putting Green Surface
13. Cleaning a Backyard Putting Green

Whether you're designing and building a putting green that's 200 sq. ft. or 2,000, there's always room for customization! Being creative and designing a golf green that fits your specific preferences is the best part of creating this outdoor space. Any obstructions such as trees and hills within the space can be designed as an obstacle for gameplay. Incorporating poles, rocks, and HVAC units into the game will also provide an added challenge and help improve your game.
The size of your putting green depends on the size of your yard. You have to think about how much of your backyard you want to dedicate to golf. While there are many benefits to installing a backyard putting green, which will increase the value of your home, prospective buyers may be turned off if you have a green that takes up the entire backyard.
Another factor that will affect the size of your backyard putting green square foot is the intended use. Are you looking to practice putting and chipping, or improve your short stroke? Once you know exactly what you want out of your synthetic putting green, speak with an expert to bring it all to life!
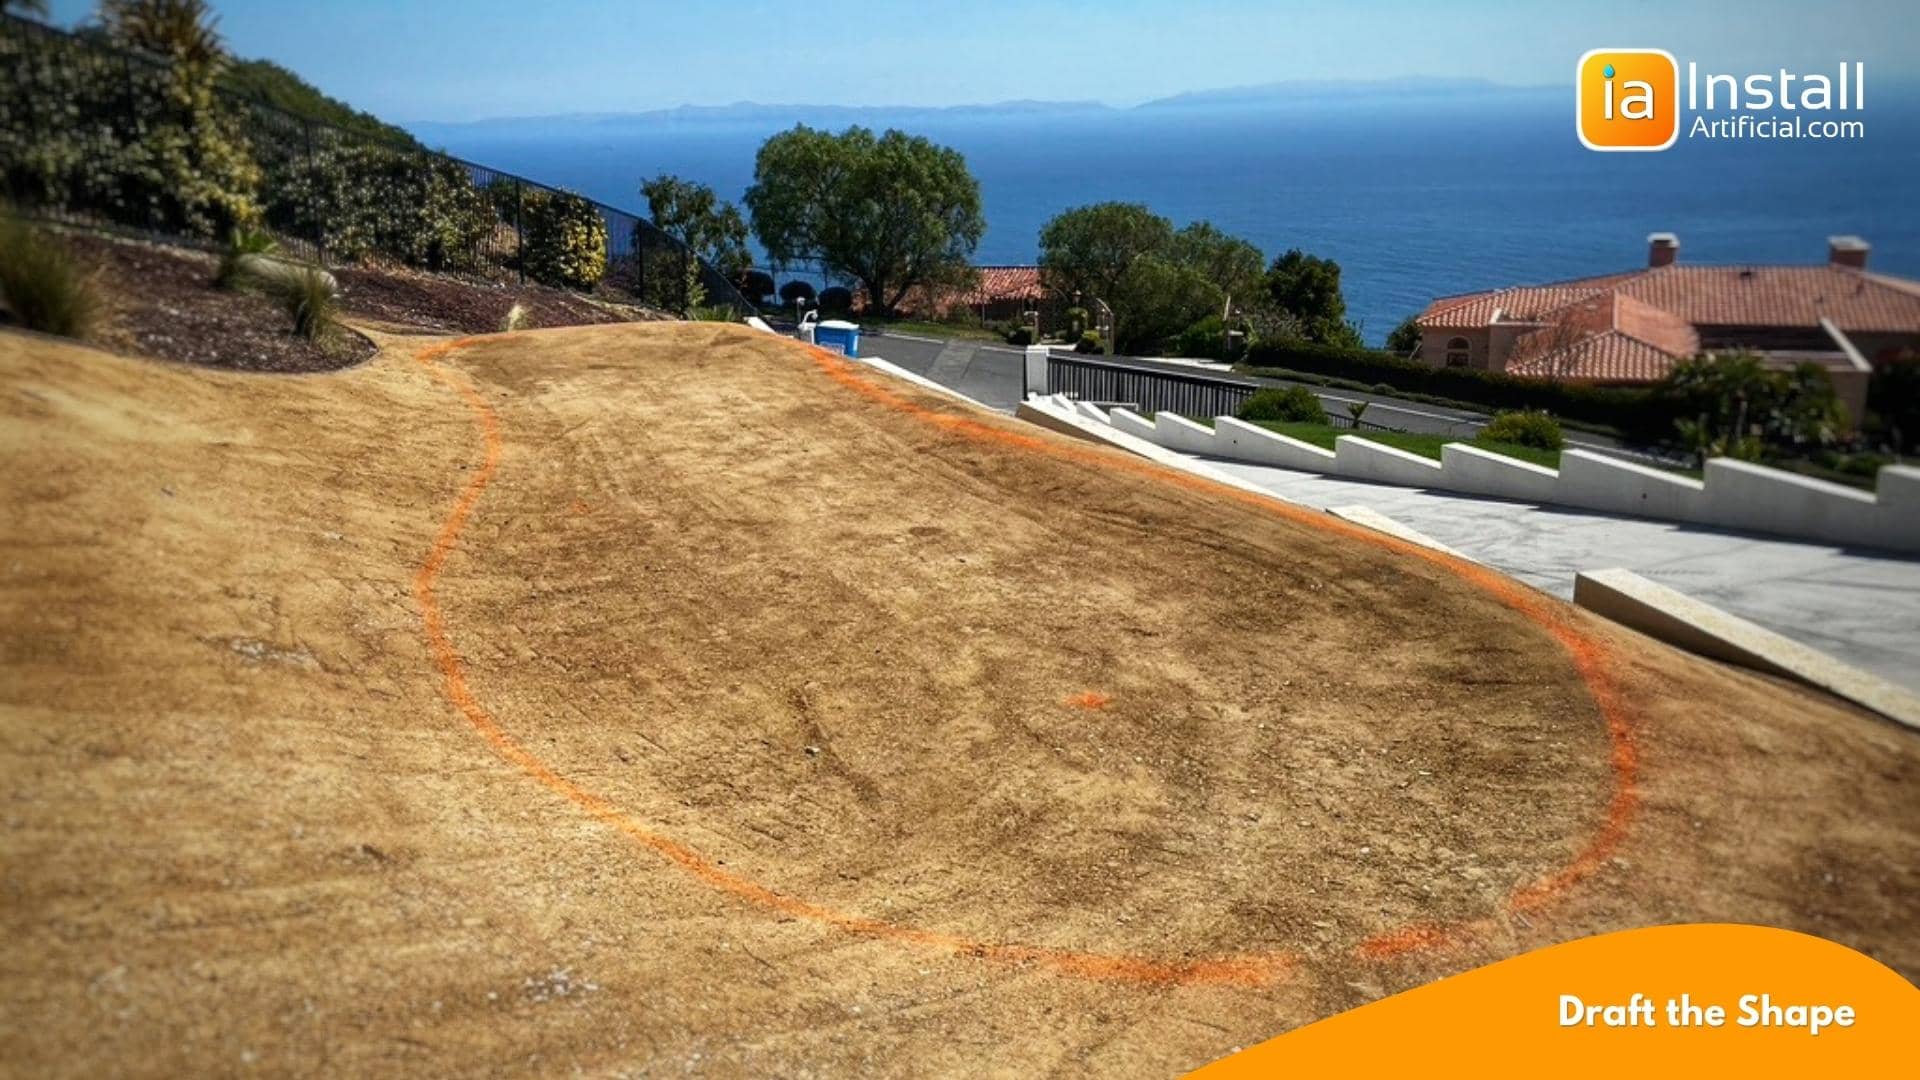
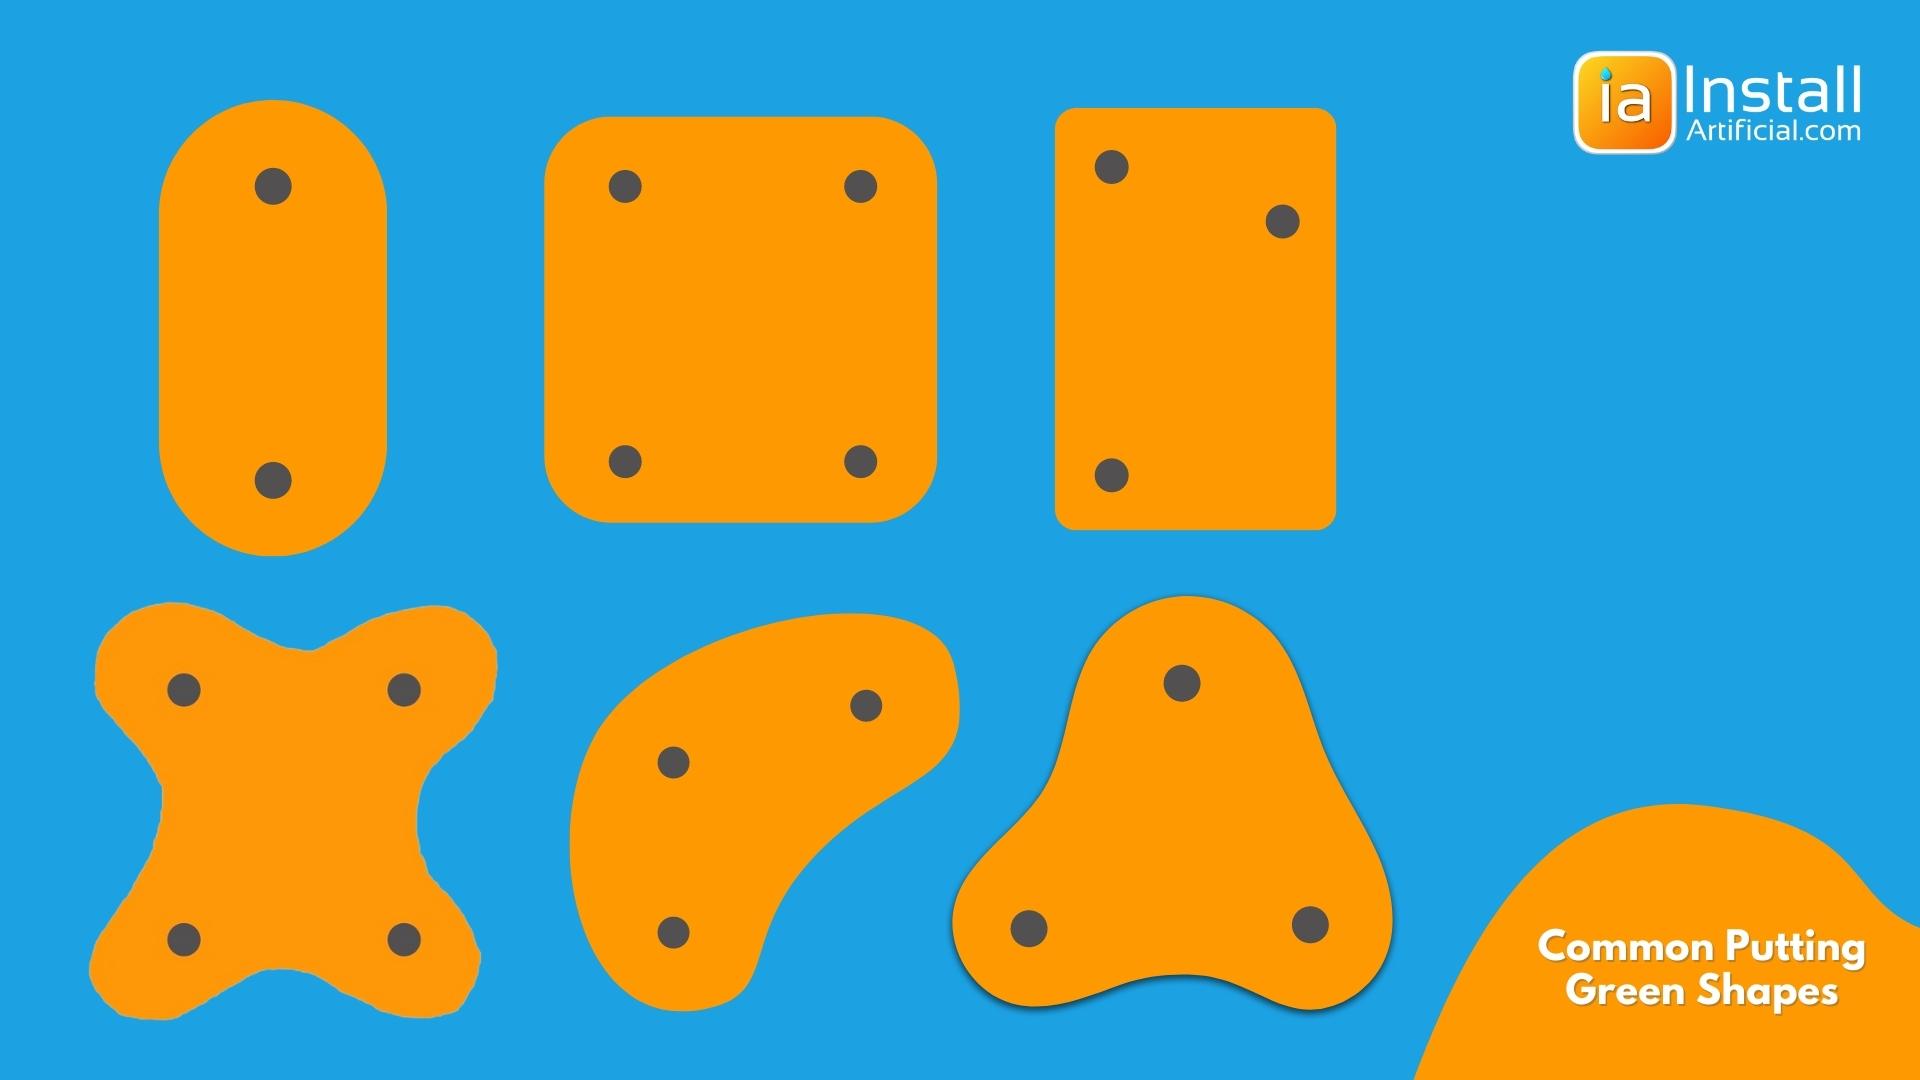
The shape of your backyard putting green is the biggest way to customize the design. Because artificial grass can be cut to fit any space, backyard, tour greens, and outdoor putting greens can be designed in nearly any shape! Often homeowners will create a shape that accommodates existing structures and obstacles in their yard. Typical shapes include bean, bone, free shape, sausage, and square. Keep reading below to see when these shapes are most recommended!
Ideal for side yards or narrow spaces.
Good to get the most out of your area when there's a tight space.
Great for larger backyards that are square or rectangular. Typically has 4 cups.
This is the most popular shape for artificial putting greens. Works best for smaller backyards.
Provides the most freedom of design. Great for irregularly shaped backyards.
No longer do you have to visit a local golf course to get in some practice. The obstacles and design of your golf green can be as simple or as complex as you prefer. Just like on an actual golf course, synthetic putting greens can come with ponds and sand traps that make the game more fun and challenging.
If you want to take your backyard and outdoor putting green one step further, upgrade your green by adding multiple holes, sand bunkers, and cuts of fringe. The more challenging the course, the more your short game will improve. Boulders, planters, and stepping stones can be incorporated into your design as obstacles!
It can be tricky to create a challenging tour green in small spaces. When you're unable to add undulations and hills, you can instead purchase obstacles online to move around your green and create different challenges. This also gives you the freedom to remove these obstacles and play on the flat green when desired. Birdieball is a good place to find creative game obstacles. We also created a list of putting green accessories that provide you with unlimited gaming customization.

Spray paint the points where your putting green cups will be installed and walk it multiple times. Make sure you place the cups strategically, to create a course with increasing difficulty. Allow space to miss your target and avoid creating a direct hit. Make sure the cups aren't blocking other shots. Do not overkill with quantity, instead think 360 - approach your targets from multiple sides, making sure there are multiple angles to hit your cup.
Think outside the box here. You can create starting points in many different areas. You can even hit from a porch using a small patch of turf or a side putting green kit purchased online!
Think about undulations and curves to enhance your golf game. Curve the surface inside the perimeter to keep the ball within the space during putting. You'll also want to consider curving the surface to make it more challenging to reach your targets.
Tall and plush fringe may make it difficult to hit the golf ball when it leaves the putting surface, however, it will help catch the ball during the golf game. Shorter fringe (such as pet turf materials) will offer you more freedom of movement outside the green and keep the ball in play even on the fringe!
The way putting green turf looks is typically what most buyers consider when choosing the putting green material. Darker and lighter options are available, with brown or lime colors used to create different shades. In regards to color, it's all about personal preference. There is an ongoing debate over nylon and poly putting green turf. We researched a ton of materials, and we could not take the side. Instead, we learned that it depends on the surface condition of the selected material, its softness, and the density of infill application.
Stimp speeds can be customized by selecting certain artificial grasses. While many believe sand infill determines the stimp speed, this is typically not the case. In order for the infill to affect the stimp speed, we'd have to add so much infill that it fills up to the top of the surface. At this point, you'd be playing on the sand, not artificial grass.
The harder and more compact the surface is, the faster the ball will roll. The highest stimp speeds are achieved with grasses made of compressed poly or thin-bladed nylon.
Nylon turf costs more, but it is more durable and elastic. Poly often provides higher stimp speed when using less sand. However, Nylon when fully infilled provides the fastest roll. If you see sun reflections from windows on the surface of the space, we'd recommend opting for a nylon material because nylon is a lot more temperature resistant.
Most often, you'll be using your new backyard golf green in the evening after work or to entertain guests. Ask the installer about installing conduits and connecting low voltage lights. This will not only light up your tour green space and keep it usable, but it will add charm to your outdoor putting green backyard!
Familiarize yourself with the putting green installation process. We'd recommend supervising how the area is prepped. There should be no soil left, and the base should be compacted multiple times. It's very important that the installers create a smoothly graded surface to prevent affecting the ball roll and gameplay. 3"+ base depth is recommended for the best results.
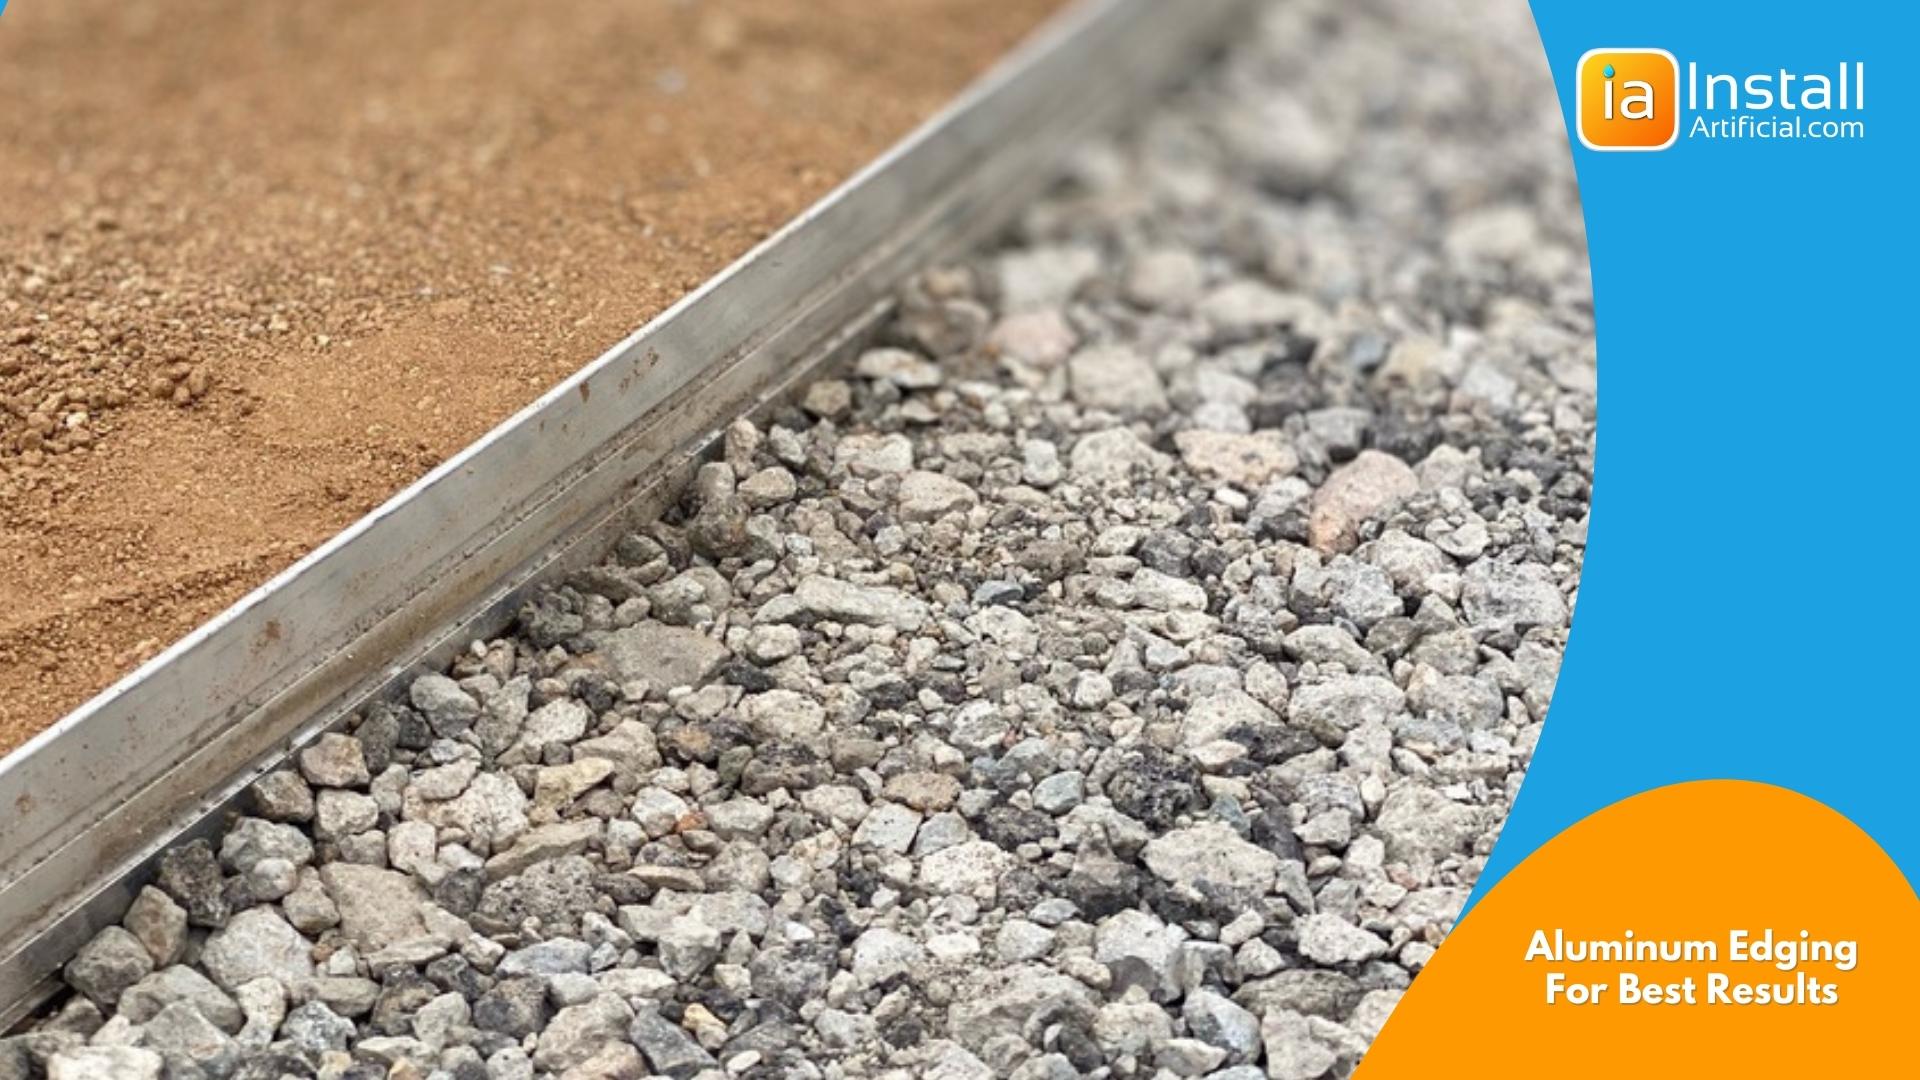
Select aluminum or steel edging to hold the road base more securely. This will also prevent discoloration over time and just elevate the look of your putting green. Avoid using a thick layer of decomposed granite. Only a thin layer should be applied because DG can be easily washed away with rainfall.
Make sure the cups are installed in concrete and leveled before the crew moves on. You can also add putting green flags to make it even more charming!
Putting green installation is not the same as artificial grass installation. The process is different and requires more rigorous labor. Expert Installers are key! If the crew you choose does not have experience with building synthetic putting greens, you may end up losing your investment. For this reason, we also don't recommend building a putting green DIY unless you've done a bunch of research and have access to professional tools.
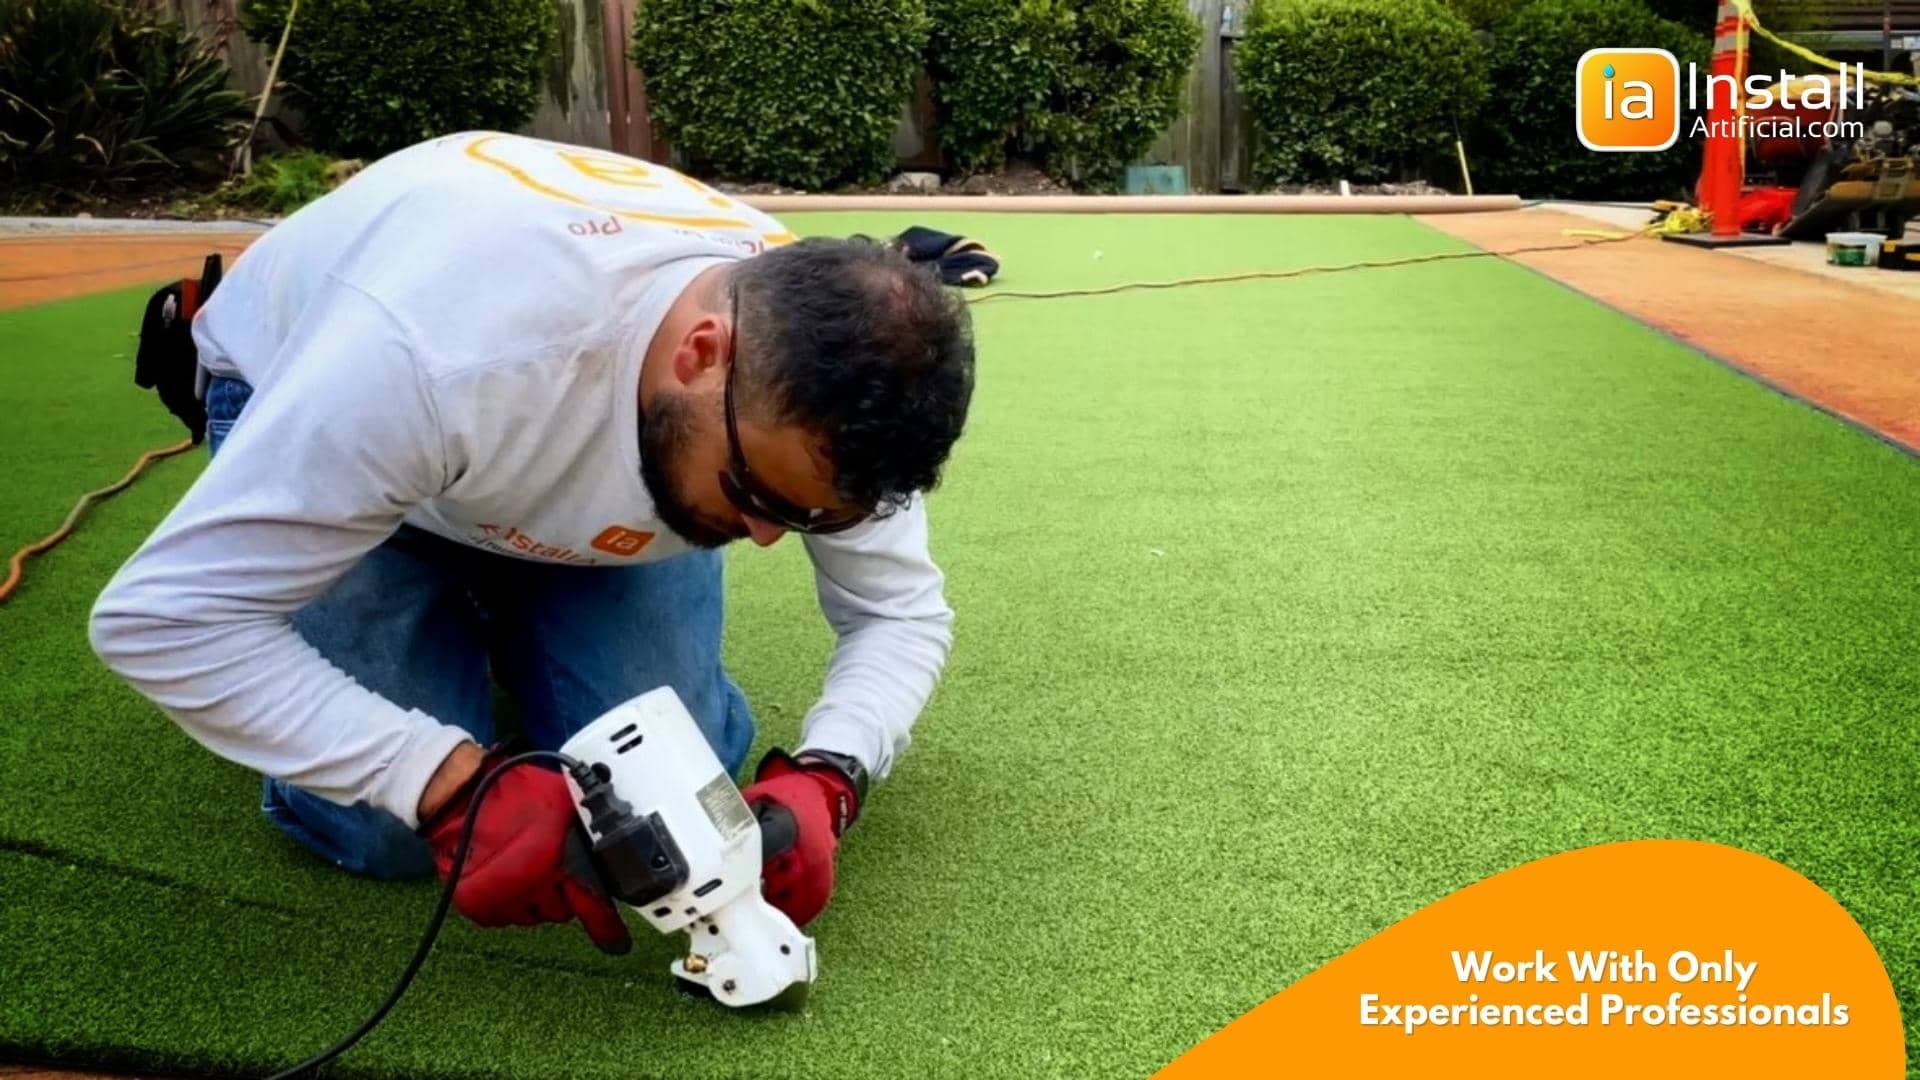
We'd recommend being there and supervising the putting green installation because it's very common for contractors to cut corners or pretend they're familiar with the process when they don't have any experience in building a putting green.
Base preparation is very important so if nothing else, monitor the base prep. Before the installation continues after compaction, test the surface with a golf ball. Make sure there's not a slope that makes the ball naturally roll. If the ball is rolling by itself, the space is not completely level and needs to be fixed before moving on. The cost of installing a putting green can be pricey, and this is the most common way that homeowners lose out on their investment. Gameplay will be useless if the sub-base and surface of your artificial putting green are not level.
Give your new backyard putting green a go while the installers are still present, unless you work on a DIY putting green turf. This is your time to assess the project. Make sure the ball is rolling to your liking. If at this point the stimp speed does not meet your expectations, you can have them adjust it by adding more infill to the synthetic turf surface.
Use an electric blower to remove debris from the surface from time to time. A push broom will help redistribute infill on your fringe and keep the blades standing upright.
Rinse the putting green surface occasionally to flush the area. When doing this, double-check that the cups are percolating water over time. If not, you can drill a hole in the bottom of the cups to assist with drainage. Avoid allowing sprinklers to consistently wet the surface as this can lead to mold development.
Can't find the answer? Browse our Putting Green FAQ section.
The golf course is a lot of fun, but if you want an exclusive space to practice your short game anytime, it's time to install an outdoor putting green! When you partner with InstallArtificial, you can choose from our carefully selected turf products to replicate the look and feel of natural grass putting. No matter what design you’re dreaming up, we can help make it a reality. We’ll work with you from initial design to final clean-up, and provide you with the putting green of your dreams.
The first layer of an artificial putting green is a compacted base material. The best base material for synthetic turf is class II road base. This base provides a solid foundation for the putting green and helps with proper drainage. You can also add a mixture of crushed rock and decomposed granite prior to compacting to ensure you have an even and smooth surface for that won't affect the ball roll.
Artificial putting greens are tricky because a smooth, solid and level playing area is crucial to the function of the green. Because of this, DIY installation for putting greens is not typically recommended. Enlist the help of professionals to have the best backyard putting green that lasts for years.
The cost of installing an outdoor putting green will vary depending on location, size, and customizations. Pricing can range anywhere from $14-22 per sq. ft.
Artificial putting greens are an excellent choice for golf enthusiasts and homeowners looking for a hassle-free practice area to perfect their putting skills all year round. When professionally installed, these synthetic greens offer numerous benefits, making them a valuable addition to any indoor or backyard space. With continuous advancements in artificial grass technology, the materials used in these greens have become even more lifelike and realistic, enhancing the overall experience.
Indeed, it is definitely possible to purchase used putting green turf. Many homeowners, as well as golf courses and sports facilities, often replace their artificial putting greens either due to regular wear and tear or to upgrade to newer and more advanced materials and designs. In such cases, the previously used artificial turf may be made available for sale as used turf. However, it is important to note that this material is generally not considered desirable.
Yes! Check out our putting green cost calculator to get an idea on the cost of your backyard putting green in just minutes. Get Putting Green Price Now.
There are several steps to installing a backyard putting green with fake grass. While some steps are similar to regular artificial grass, there are a few key differences. From drafting the design to installing the base and creating slopes it can be a strenuous process. Learn more with our How to Install Putting Greens article!
Yes, golf practice mats can be effective tools for improving your golf game and maintaining your skills when you can't make it to the course. Golf practice mats are portable, artificial turf surfaces designed to simulate the feel of hitting shots from the fairway or rough. The consistent surface can really improve your game over time. Check out the best practice mats for golf!
To create a truly realistic putting green experience in your backyard, it's essential to choose the right type of artificial grass. Opt for a specific variety that accurately replicates the characteristics of real grass. Look for artificial grass with a short pile height of around half an inch.
Keep in mind that the texture of the putting green grass can have an impact on the speed and roll of the ball. Different surfaces will provide varying stimp speeds, so select the one that suits your preferences. Additionally, consider whether the product has infill or not, as this can also affect the ball roll. Artificial grass with infill will result in a faster roll, while those without infill will offer a slower and more controlled roll.
By considering these factors when choosing your artificial grass, you can create a backyard putting green that truly emulates the experience of playing on a real green.
When considering the durability of your putting green turf, it is crucial to assess various factors related to how you will use it and the conditions in your household. By asking yourself the following questions, you can determine the level of durability required:
1. Frequency of use: How often do you plan on utilizing your putting green? Will it be used for daily practice, occasional use, or something in between? Understanding the frequency of use will help you gauge the wear and tear the turf will experience.
2. Users: Who will be using the putting green? Are they experienced golfers, beginners, or a mix of both? This information will enable you to assess the potential impact on the turf based on different skill levels and practice routines.
3. Family dynamics: Take into account if there are children in your household who may play and run on the turf. Additionally, consider whether you have any pets, such as dogs, who might interact with the putting green. The activity levels and size of these family members will influence the durability requirements of the turf.
4. Pet activity: If you have dogs, evaluate how active they are. Some dogs may be more prone to digging, running, or causing damage to the turf. Understanding their behavior will help you determine the necessary durability and resilience of the turf.
When choosing a top-quality installation for your putting green turf, it's important to consider several key factors:
1. Durability: Evaluate the level of foot traffic your putting green will endure. Whether it's used for daily practice or occasional play, take into account the activity level and size of your family members, including children and pets. This information will guide you in selecting a turf product that can withstand the expected usage and maintain its durability over time.
2. Authentic Putting Experience: Opt for artificial grass that closely replicates the texture and performance of a real putting green. It should provide a consistent and smooth surface to ensure that your practice translates well to actual golf courses. Look for a short pile height, approximately half an inch, which is ideal for putting. Keep in mind that using infill in the turf can increase ball speed, while opting for no infill can slow it down.
3. Customizable Design: Let your imagination run wild when designing the layout of your putting green. While a simple strip of artificial grass with a hole is an option, consider incorporating existing features of your yard, such as slopes, trees, berms, or ponds, to create a more challenging and visually captivating golf hole. With artificial turf, the design possibilities for your putting green are virtually limitless, allowing you to personalize it according to your preferences and skill level.
4. Low Maintenance: Although maintaining artificial turf is easier compared to natural grass, some upkeep is still required to keep it in its best condition. If you choose a turf product with infill, occasional replenishment may be necessary as the infill can disperse over time. Additionally, it's essential to remove leaves, twigs, and debris using a leaf blower or broom. Due to the short pile height of putting green turf, you may not need to fluff the fibers with a power broom.
5. Trusted and Experienced Installers: Selecting a reliable and reputable artificial grass installation company is vital for a successful putting green installation. Uneven spots or a single divot can significantly impact the playability of your green. Look for installers who have a proven track record of installing putting greens specifically. Don't hesitate to read reviews from multiple sources to ensure consistency in their work. A trustworthy installer should be willing to address your concerns, answer any questions, and guide you through every step of the installation process.
Infill plays a crucial role in keeping synthetic turf fibers upright and maintaining a realistic appearance. By adding weight to the artificial grass, infill prevents the formation of wrinkles, warping, and shifting over time, ensuring that the fibers stay grounded and aligned.
There are various types of infill available, with many of them made from natural materials. Examples include sand, cork, walnut shells, and ziolite. The infill material, like rounded silica sand, enhances the turf's realism by mimicking the properties of natural grass.
By filling the gaps between the synthetic turf fibers, infill helps to maintain their upright position even with heavy use. This ensures that the turf retains its original shape and appearance, creating a more natural and visually pleasing aesthetic. Additionally, infill reinforces the overall structure of the synthetic turf, making it more durable and resistant to wear and tear.
Infill material is a vital component used in synthetic grass products for a multitude of purposes. Its primary function is to uphold the integrity of the turf fibers, ensuring they can withstand the rigors of regular use. Much like how soil supports the growth of natural grass, infill plays a crucial role in maintaining the realistic appearance and natural feel of artificial turf. Moreover, infill adds weight to the artificial grass, preventing the formation of unsightly wrinkles, warping, and shifting over time.
There are numerous types of infill materials available, with the majority derived from natural sources. Some popular examples include sand, cork, walnut shells, and zeolite.
When selecting the perfect putting green turf products for your backyard, it's important to take several factors into consideration.
1. Extensive Research: Start by conducting thorough research on the various types of artificial grass available in the market. Just like on a golf course, different species, thicknesses, and heights of artificial grass are suitable for different purposes. Explore different options and consult with experts to determine which products will perform well and are best suited for a putting green.
2. Terminology: Familiarize yourself with the terminology used in the artificial turf industry. Understanding the specifications and terms will help you identify the right products for your backyard putting green.
3. Yarn Fibers: Consider the types of yarn fibers used in the artificial grass. Common options include Polyethylene, Polypropylene, and Nylon. Each type has different characteristics, so choose the one that meets your specific requirements.
4. Thatch: Thatch mimics the natural progression of dead and dying grass beneath the actively growing grass. It adds a cushioning effect to synthetic turf. Look for artificial grass with an appropriate amount of thatch for optimal playability.
5. Density: Consider the density of the turf product, which refers to the number of stitches per square meter. A more dense product generally indicates higher quality and durability. Opting for a denser turf will provide better performance and longevity.
6. Face Weight: Pay attention to the face weight, which only includes the weight of the yarn and thatch. Higher face weight implies more material, resulting in better durability. Selecting a turf with a higher face weight can ensure it can withstand frequent use.
7. Pile Height: The pile height refers to the height of the synthetic turf fibers. When it comes to putting green turf, an abnormally short pile height is necessary for a smooth and realistic ball roll.
8. Turf Backing: Assess the quality of the turf backing, including the primary and secondary backing. A durable turf backing is essential for the longevity and stability of the putting green turf.
9. Drainage: Putting green turf may have different drainage requirements compared to other artificial grass. While the small square footage of the green often mitigates drainage issues, it is still important to ensure proper drainage to maintain the playability and integrity of the surface.
10. Color: Artificial grass now comes in a wide variety of colors. Consider selecting a color that coordinates well with the neighboring natural lawns, ensuring a visually cohesive landscape.
By carefully considering these factors, you will be able to choose the best putting green turf product for your backyard, enhancing your golfing experience.
The color of artificial grass is a vital element in creating a realistic and visually appealing look. To emulate the natural beauty of different grass species, synthetic turf is meticulously designed to closely match the colors found in real lawns. Unlike natural grass, where each blade may have slight color variations, high-quality artificial turf incorporates multiple shades of yarn. These subtle color differences effectively mimic the natural inconsistencies seen in real grass, resulting in an authentic and lifelike appearance. By incorporating a diverse range of colors, artificial grass seamlessly blends with the surrounding natural lawns, creating a visually convincing illusion that enhances its overall realistic look.
Putting green turf possesses distinct drainage characteristics that set it apart from other types of artificial grass. Unlike regular artificial grass, it does not drain in the same manner. However, due to the typically smaller size of putting greens, this distinction is often of minor significance.
When it comes to the materials used in the construction of artificial grass, three primary base materials are typically employed: Polyethylene, Polypropylene, and Nylon.
While Polyethylene is mainly used in the backing of the turf rather than the yarn fibers themselves, when it comes to fake grass specifically designed for putting greens, the materials of choice are often polypropylene or nylon, each offering its own unique advantages.
Nylon, although comparatively more expensive, is renowned for its exceptional durability. As a result, the best artificial grass products for putting green applications frequently utilize nylon fibers. On the other hand, polypropylene closely mimics the appearance and texture of natural grass, although it is more susceptible to matting and developing ruts when compared to nylon.
The height at which the synthetic turf fibers stand on putting green turf is known as the pile height. In the realm of putting green turf, the pile height is a critical factor in replicating the characteristics of a real putting green. Rather than focusing solely on aesthetics, the objective of putting green turf is to recreate the physics of an actual putting surface.
For this reason, having a significantly shorter pile height is of utmost importance for putting green turf. This is because the pile height directly impacts the short game. A shorter pile height allows the golf ball to roll smoothly and consistently across the surface, closely mirroring its behavior on a natural putting green. Conversely, using longer pile heights can have a negative effect on the precision and accuracy of a golfer's short game, detracting from its realism and potentially hindering their performance.
The face weight of artificial turf refers to the weight of the yarn and thatch present in the turf, excluding the backing material. This factor is crucial in determining the quality and durability of the turf, as well as its ability to withstand wear and tear.
A higher face weight indicates that there is a greater amount of material in the turf, making it more resilient to damage caused by heavy use and foot traffic. When a turf has a high face weight, it means that there is a denser arrangement of fibers, which contributes to its durability. This density allows the turf to absorb the impact of regular use and minimizes the appearance of wear over time. As a result, high-quality turf products typically have a face weight of 60 ounces or more per square yard of material.
Conversely, turfs with low face weights may appear and feel thin or cheaply made. With less material to distribute the stress of usage, these turfs are more prone to flattened or matted fibers, resulting in a less attractive and less durable surface. Additionally, turfs with low face weights may struggle to withstand heavy foot traffic and exhibit signs of wear and tear more quickly.
Polypropylene vs. Nylon putting green is a large debate among installers and contractors in the turf industry. Which putting green material is best for realistic golf...
Learn what stimp speed is and how it affects gameplay on backyard putting greens. Hear common misconceptions about what causes the fluctuation of stimp speed. Discover...